
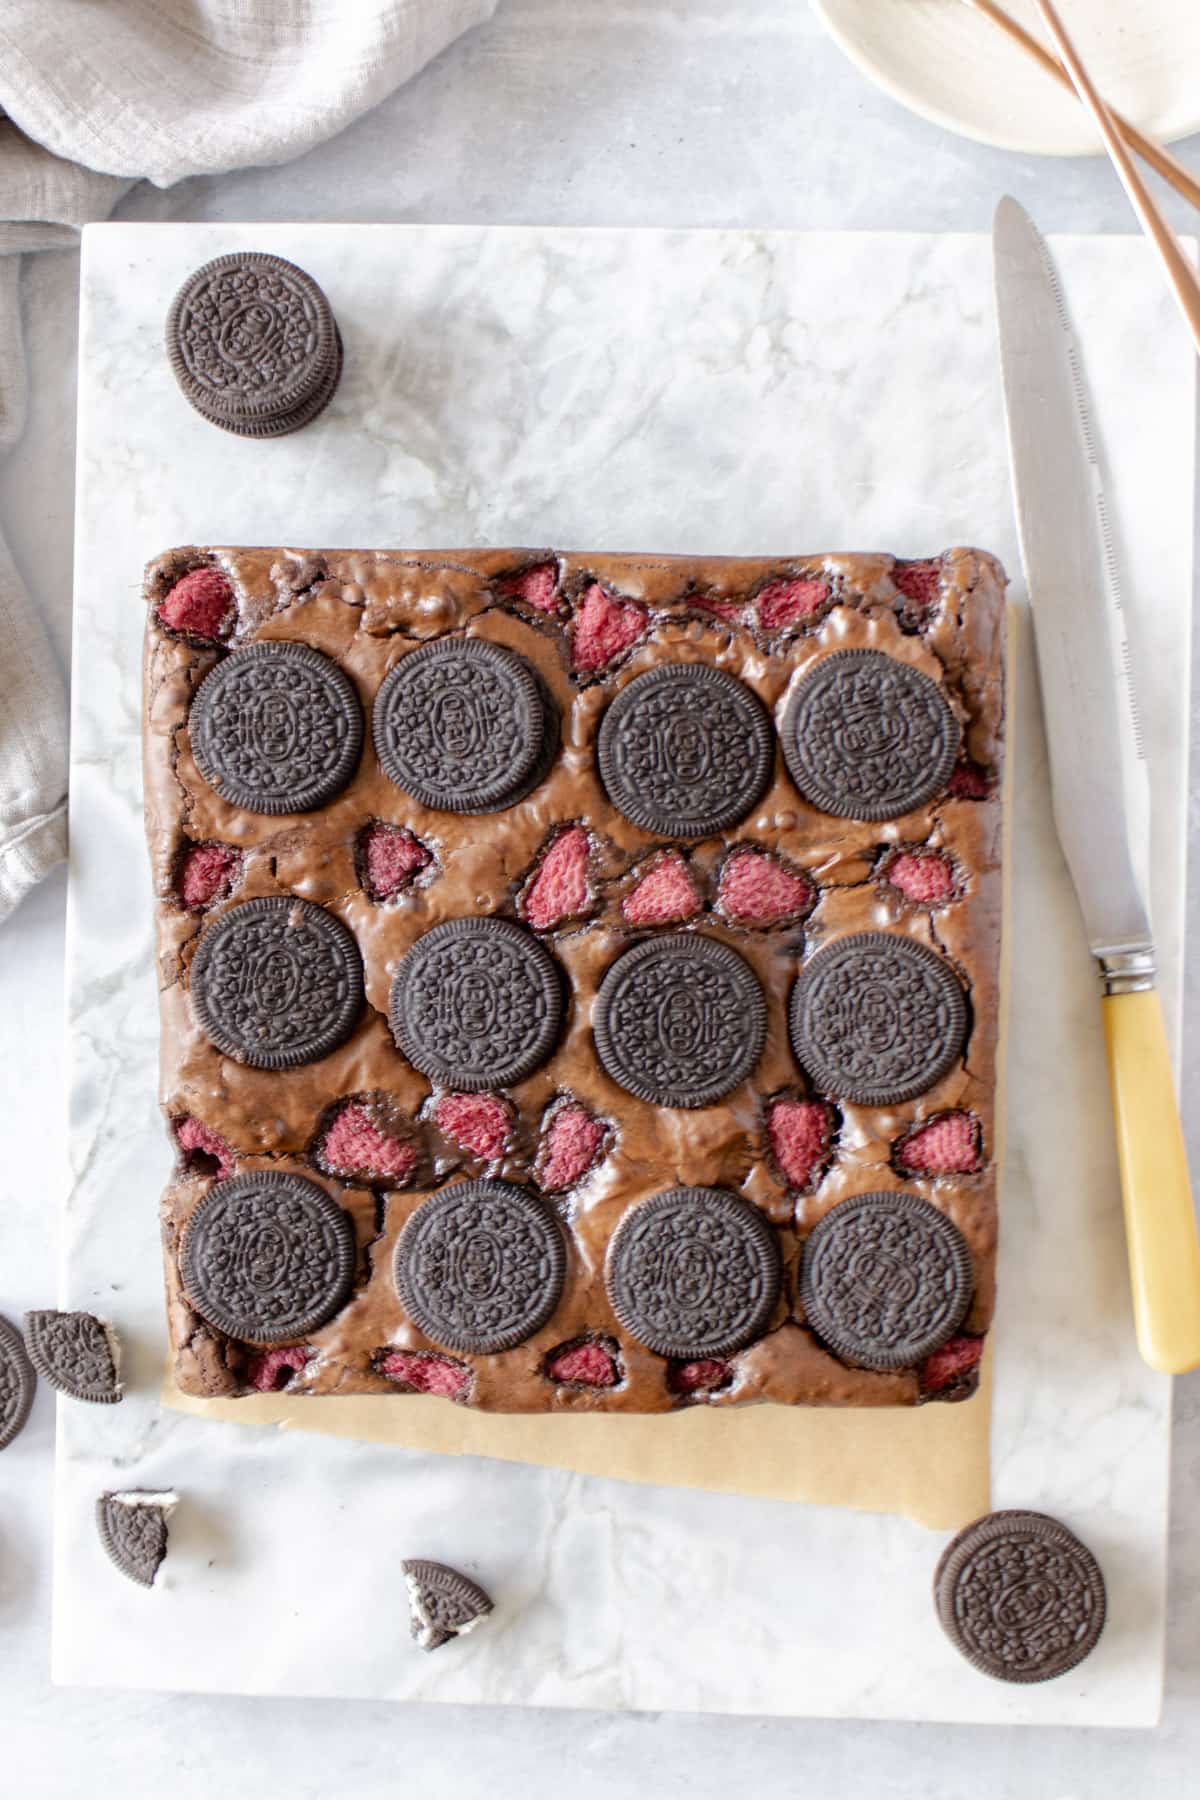
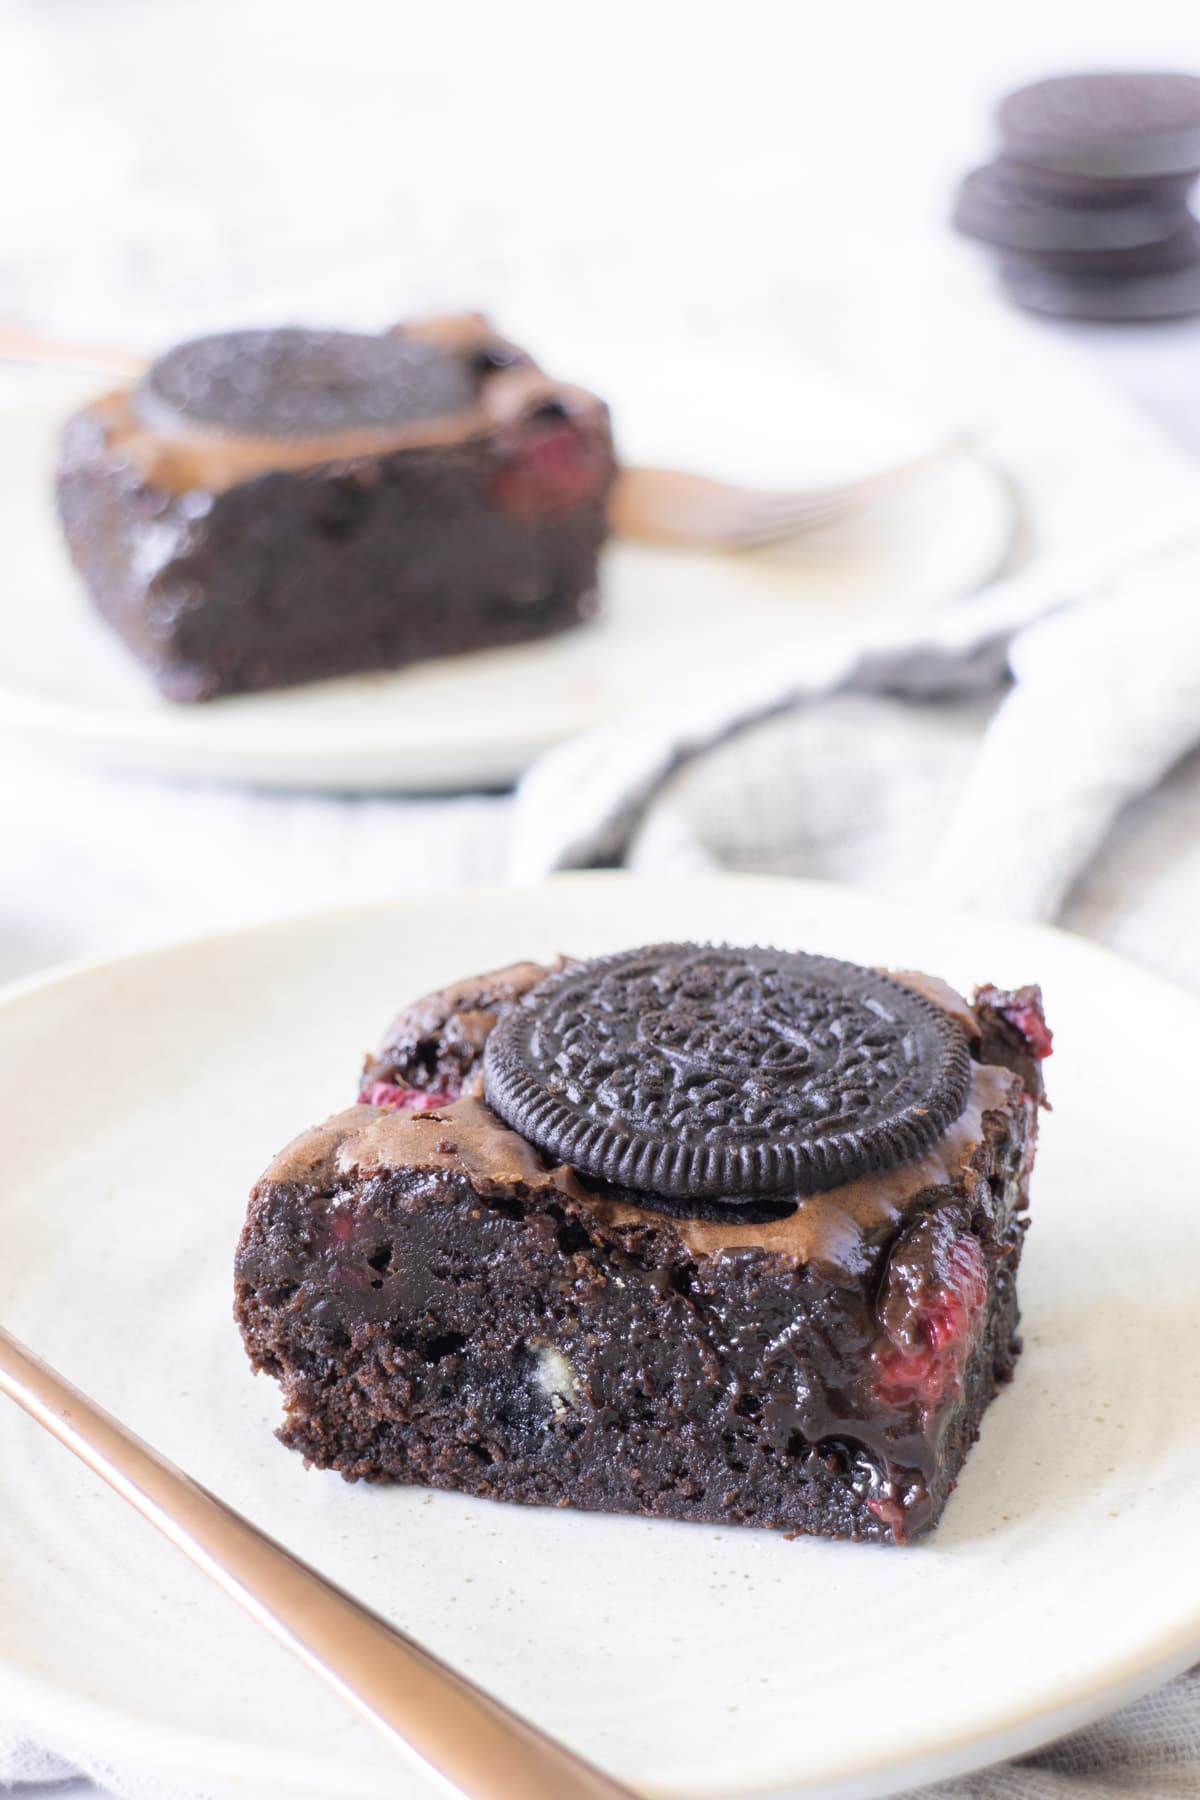
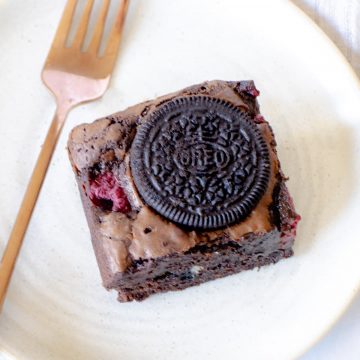
Thick, fudgy and devilishly rich, these raspberry Oreo brownies are the perfect slice of chocolate heaven. Stuffed with layers of Oreo chunks and fresh raspberries, one slice is never enough. Deliciously easy, this brownie batter is a one-bowl delight, so there’s less washing up. Tempted?

Lou’s recipe overview
SKILL: Intermediate
TASTE: Devilishly rich and perfectly fudgy
PROS: Raspberries and Oreos – the perfect combo!
CONS: Be quick, they disappear quickly
Hello there lovely little brownie; what took you so long to get here!
I’m so excited to finally going to share this utterly indulgent and delicious easy recipe. This one has been at least 4 years in the making since I first ventured into the world of YouTube. And sadly I haven’t made these since…
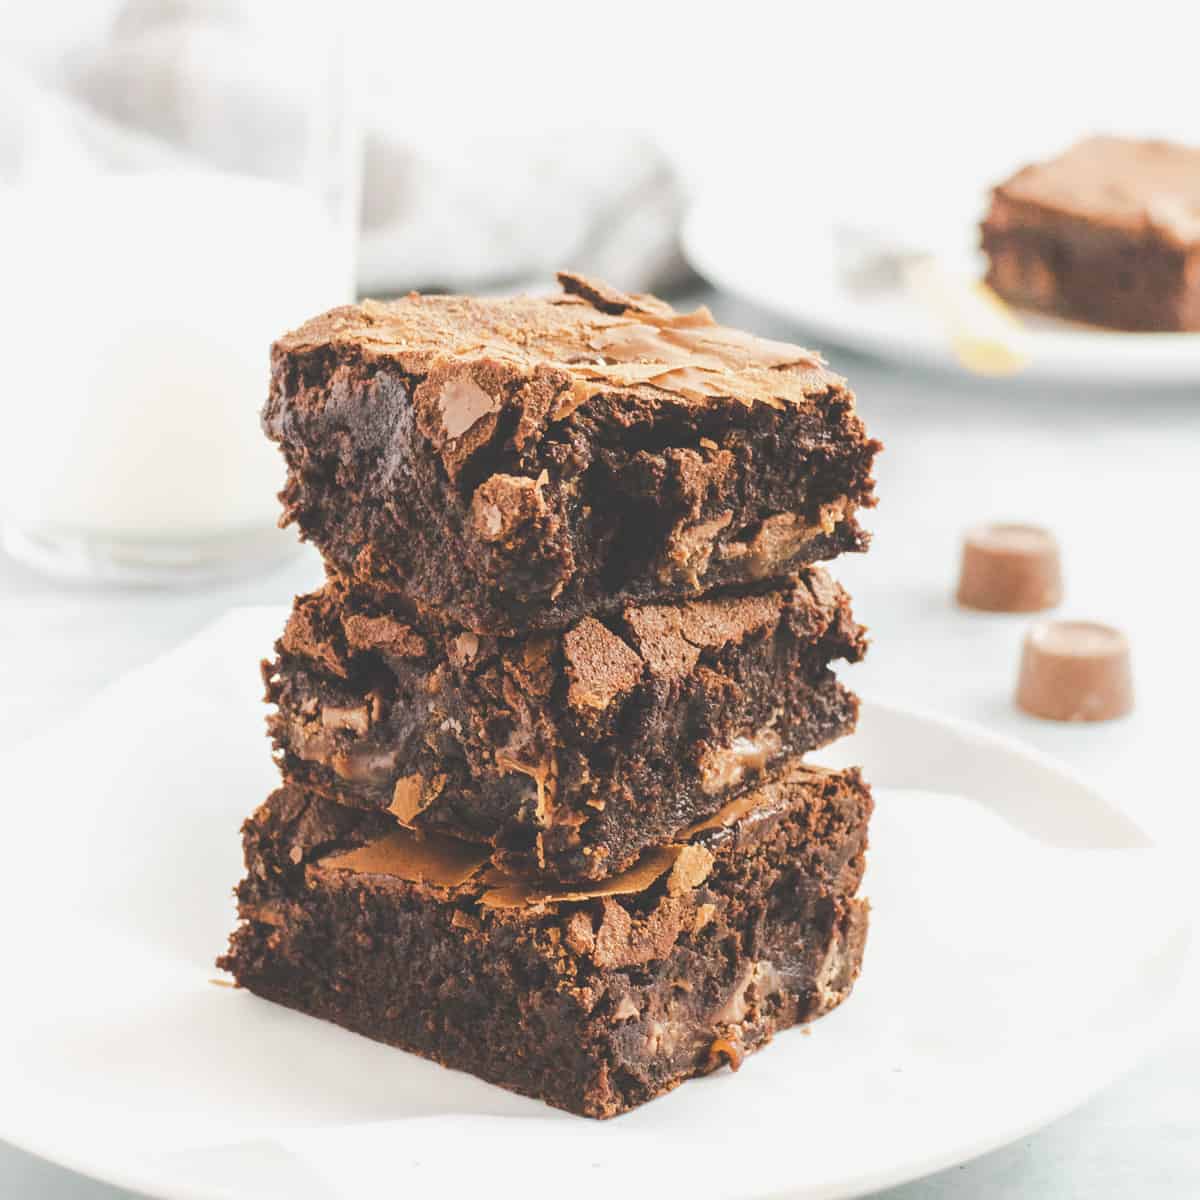
I just haven’t got round to them; I’ve been busy so many more amazing brownie recipes like my Kinder Bueno brownies and Rolo brownies that they completely slipped my mind.
Until now…
Just like my other brownie recipes, these guys are thick, fudgy and so worth the bake wait. And the fresh raspberries tick the one of your five-a-day, so they’ve got to be healthier. Haven’t they?!
If you want to skip the essential recipe information and handy tips for the best Raspberry Oreo Brownies, head on down to the recipe card.
Why you’ll love these brownies
Well let me just tell you that hunk of fudgy chocolate baked goodness right there, is devilishly good. And that should be all you need to know. But if you need a little extra convincing then…
- Chocolate overload is an understatement… this is chocolate heaven
- Stuffed with layers of everyone’s favourite Oreo cookies
- Tried and test go-to brownie recipe that works every time
- Quick to make, less than one hour start to finish
- One bowl, super easy mix meaning less washing up
Get that brownie recipe nailed and I promise you, you can switch it up anyway you like, with any cookie you want – just like my Jaffa Cake brownies!
What you need to make these brownies
View my Amazon shopping list with equipment and ingredients
I guarantee that you’ve probably got everything you need to need these raspberry Oreo brownies in the kitchen cupboard. So here’s what you’ll need to go and grab to get started…
The Ingredients
This recipe really is deliciously easy, and there’s no fancy ingredients needed; just make sure you have:
- Oreo Cookies – I’m using just regular Oreos, but if you fancy mixing it up a little with extra chocolate why not try the brownie batter version or if you love that cream filling, the double stuffed ones. You can also swap for own-brand versions if on a budget.
- Fresh Raspberries – I love the burst and tang of the raspberries with the rich chocolate brownie batter and the crunch of the Oreos.
- Soft Dark brown sugar – This is my favourite top tip for rich, fudgy brownies. Not only will it give you a deep flavour but the sugar helps stop the brownies drying out, giving them the perfect texture.
- Caster Sugar or Superfine Sugar – I like to use a mix of sugars and the caster sugar gives you that lovely brownie crust on top without the brownie crumbling apart.
- Unsalted Butter – I add a pinch of fine sea salt to bring out the butteriness; but you can use slightly salted butter if you prefer.
- Plain Flour or All-Purpose Flour
- Eggs
TOP TIP: Fresh raspberries will give you the best results. Avoid frozen raspberries as they will add moisture into the batter as they defrost during the baking.
The Equipment
All my blondie and brownie recipes are super easy one-bowl recipes, and I absolutely love it as there’s less mess… but less washing up!
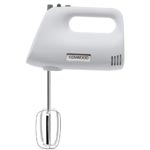
I make the brownie batter using a handheld mixer to ensure that I incorporate lots of air when whisking the eggs. You can also use a stand mixer or a balloon whisk if you prefer.
You’ll also need something to bake the brownies in, and I prefer to use a loose-based cake pin, but it will work in any of the following:
REMEMBER: If you make your brownies in a tin different to the recommended sizes you will need to adjust the baking times. Smaller tin – longer time/ larger tin – shorter time.
Recommended ingredients and equipment

How to make these brownies
Full measurements and instructions can be found in the recipe card
Honestly this recipe is deliciously easy to make and it’s also a perfect one to get little bakers involved too. Just keep an eye on those Oreos, mine tend to go missing when I’m making this recipe… one for me, one for the brownies!
Making the batter
Start off by melting the butter and the chocolate together – you can do this over a pan of simmering water as a double boiler or in 30 second blasts in the microwave. When melted, stir everything together and leave to one side to cool.
In a large mixing bowl whisk the sugars and the eggs until the mixture is thick, pale and fluffy. Add in the cooled melted chocolate mixture and gently stir until well combined.
Sieve the flour and the cocoa powder together and fold into the batter mixture. Before adding in the Oreo pieces and folding together until evenly mixed.
TOP TIP: Make sure you whisk the eggs and the sugar for at least 3 minutes to ensure plenty of air is incorporated. This will help keep the brownies light and fudgy, rather than heavy and dense.
Assembling the brownies
First up, line your cake pan or brownie pan with parchment paper, then pour in half your brownie batter. Use the back of a spoon or an angled palette knife and level off the batter.
Scatter over half of the fresh raspberries, then pour over the remaining brownie batter and level off again.
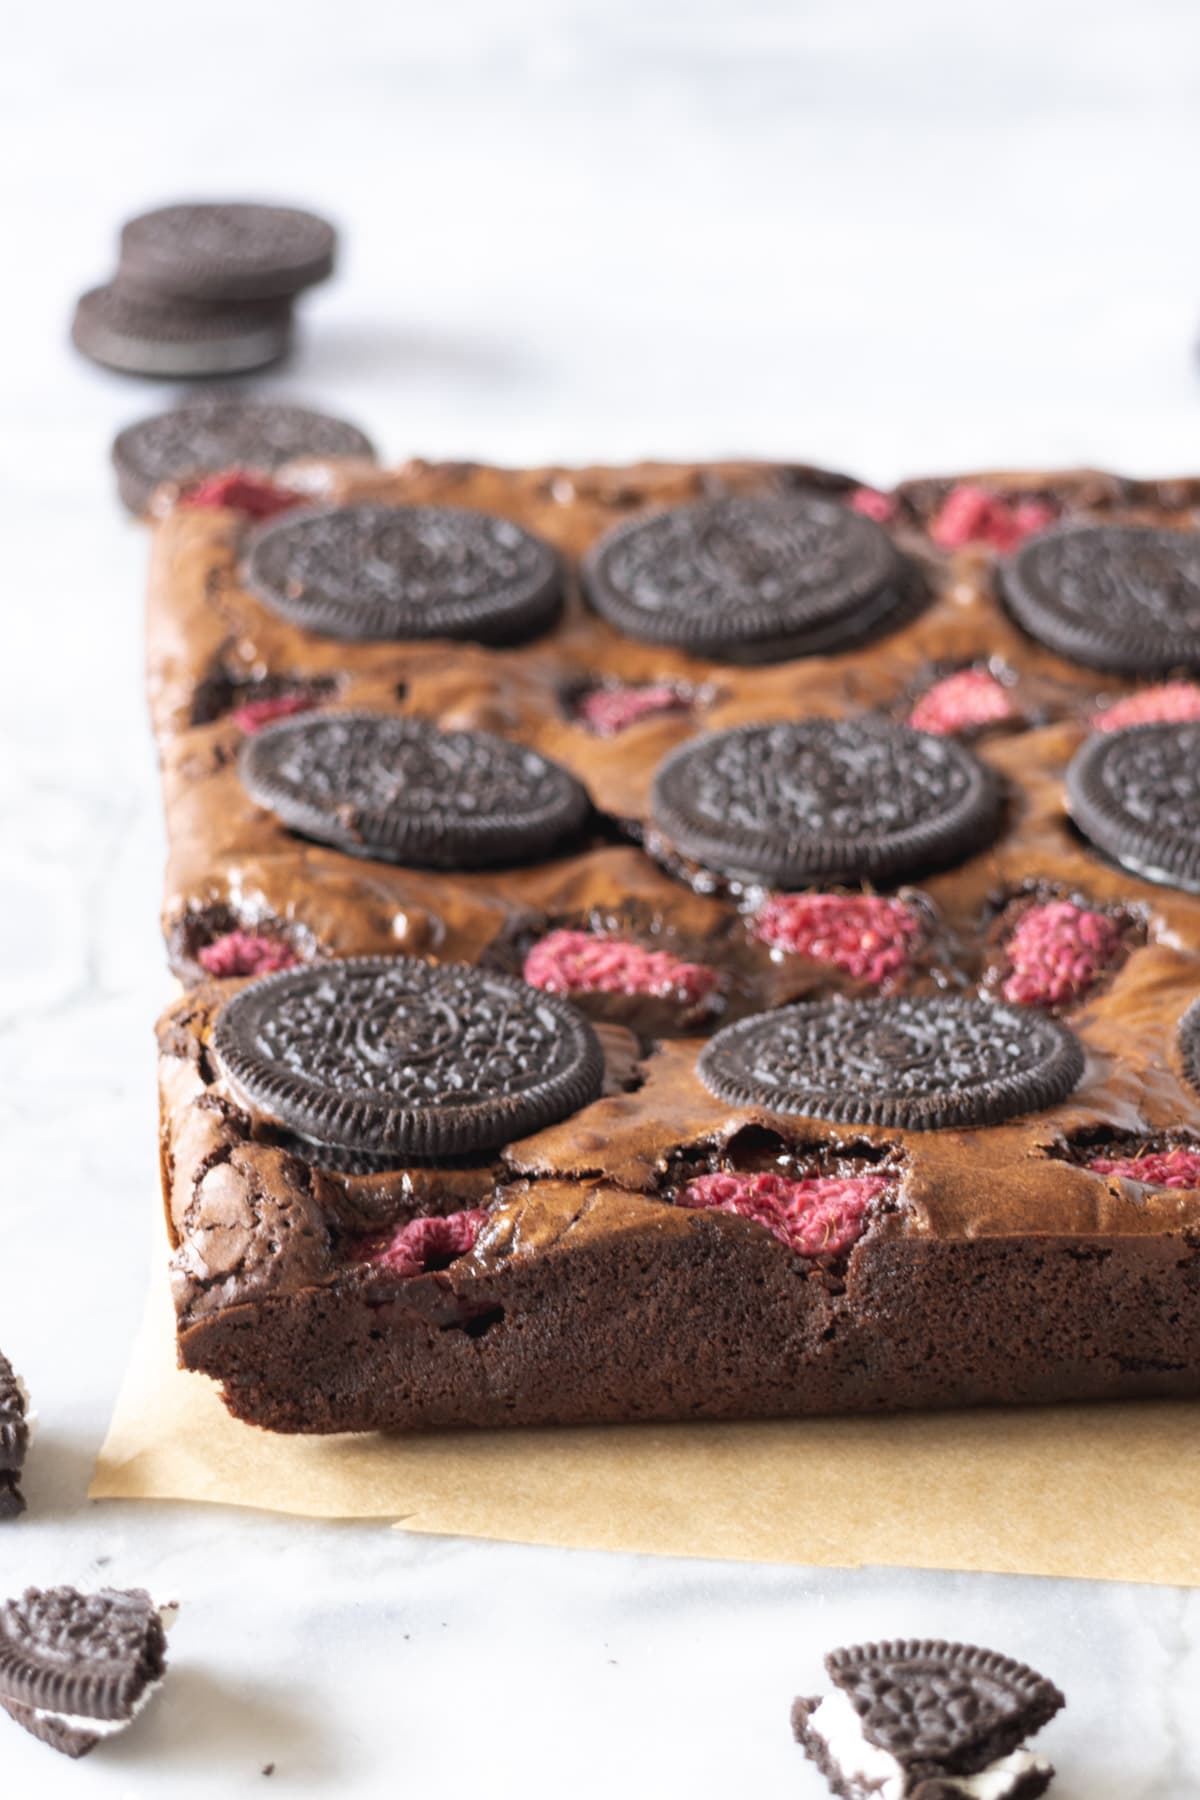
Place the remaining Oreo cookies and raspberries on top of the batter, pushing them into the batter slightly so they don’t pop out when baking.
TOP TIP: When lining your cake or brownie pan, allow a little excess parchment to overhang the sides. This makes it easier to lift out the blondies when they have cooled.
Baking the brownies
Bake the brownies for 30-35 minutes in a pre-heated oven at 180C/ 350F.
Once cooked, allow the brownies to cool for at least 15 minutes before lifting out of the pan; then leave to completely cool on a wire cooling rack.
Step by step live video
Frequently asked questions
How make brownies does this recipe make?
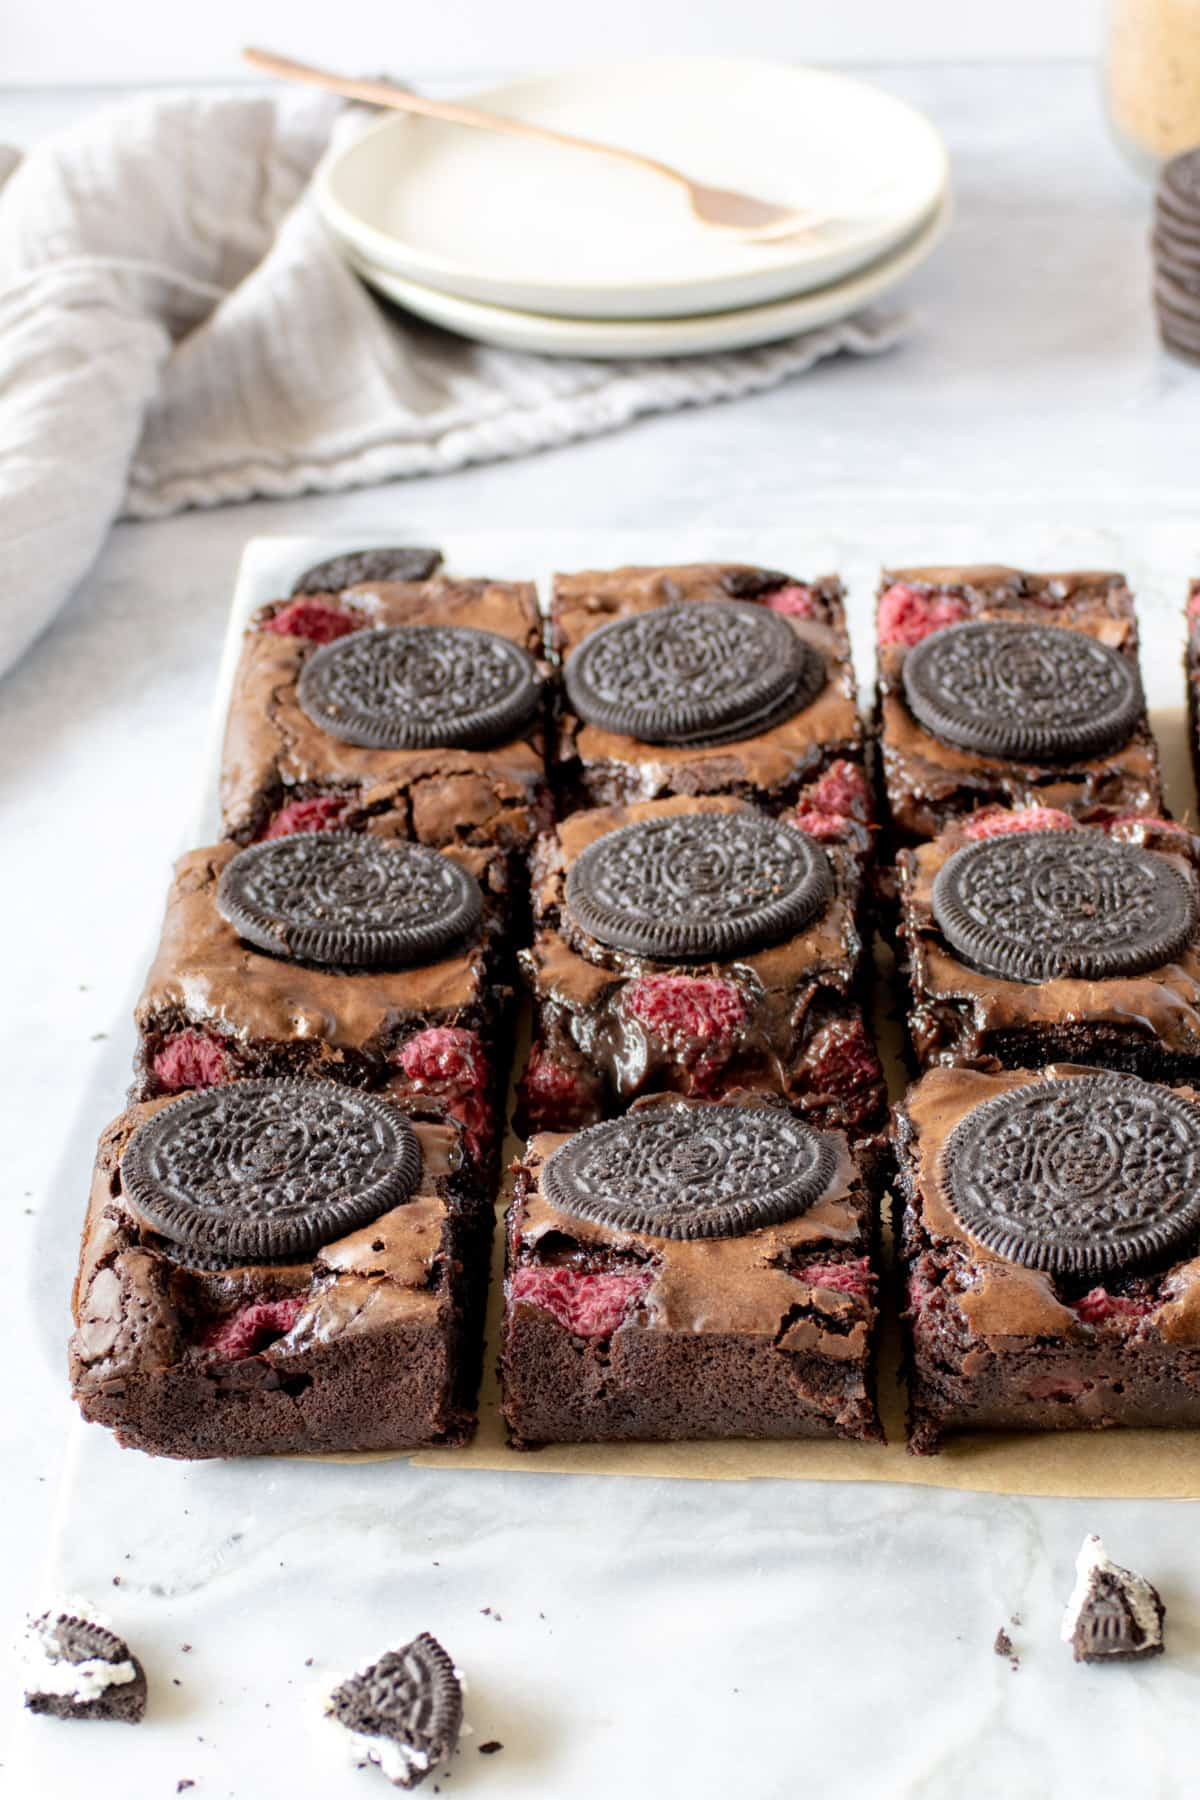
This recipe will make between 9 and 16 brownies, depending on how large you make the slices when portioning up.
How should the brownies be stored?
Because the brownies have fresh fruit in them, it is best to keep these in the fridge in an air-tight container or covered with kitchen foil.
How long will these brownies keep for?
The brownies are best enjoyed within 3 days but will keep for up to 5 days if stored correctly.
Can the brownies be frozen?
Yes they can! It’s best to portion the brownies into slices before freezing. Wrap them in baking parchment before placing in a freezer-proof container. The brownies will keep for 1-2 months, and remember to defrost them before eating.
Recipe top tips and notes
I honestly can’t tell you enough how easy this brownie recipe is and how much you need to make these as soon as possible! And I really want you to make these and love them as much as I do.
So for the best results, here are my top tips to making sure you get the perfect brownie every time!
- Make sure your eggs are at room temperature – Fridge-cold eggs straight are harder to whisk and get thick and fluffy mixture that you’re looking for. So make sure to get them out of the fridge in plenty of time and let them come up to room temperature. Alternatively, pop them in warm tap water for 10 minutes and they will come up to temperature.
- Don’t be tempted to over-bake – Lots of brownie recipes have different bake times, and you oven won’t be exactly the same as mine. I’ve tried and tested this recipe so many times but for you it’s important to test your brownies at about 5 minutes before the end of the bake time and bake for a little longer if needed.
- Are the brownies baked? Use a toothpick – For the perfect texture, the centre of the brownies will not quite be fully baked. So rather than testing the centre, test the edge of the brownies about 1-inch in. Poke with a toothpick and if it comes out with a few crumbs and a tiny smear of batter, they’re done. If you wait until your skewer comes out of the centre of the brownie clean, then you’ve gone too far and you’ll have dry, cakey brownies.
- Getting the perfect slice – If you want perfect edges to your brownie slices when you slice them, then firstly they have to be completely and utterly cool! Pop them in the fridge for 30 minutes to chill, then when you slice the brownies up, you’ll get nice straight edges; no tears.

More brownie recipes to try
If you liked these raspberry Oreo brownies here are some other recipes that I think you’d enjoy…


Raspberry Oreo Brownies
Equipment
Ingredients
- 200 g Butter Unsalted
- 200 g Dark Chocolate
- 150 g Caster Sugar or Superfine Sugar
- 200 g Soft Dark Brown Sugar
- 4 Eggs Medium
- 120 g Plain Flour or All Purpose Flour
- 50 g Cocoa Powder
- 20 Oreo Cookies
- 150 g Raspberries Fresh
Instructions
- Preheat the oven to 180C/350F, and line a 9-inch cake pan or brownie tin with baking parchment.
- Melt the chocolate and butter in a heat-proof bowl over a small pan of simmering water (double boiler) or in a microwave. Leave the melted mixture to cool down.
- In a large mixing bowl, beat together the eggs and caster sugar with a handheld mixer for about 3 minutes until the mixture is thick, pale and fluffy. Alternatively, whisk together in a stand mixer with the balloon attachment.
- Pour the cooled melted chocolate mixture into the egg mixture and gently whisk on low speed until well combined. The mixture should be silky and smooth.
- Sieve together the flour and cocoa powder, and add into the chocolate mixture. Gently fold together with a metal spoon or spatula making sure everything is well combined and there are no pockets of unmixed flour.
- Break 8 Oreos into chunks and add them into the batter. Stir everything together until well combined. Save the remaining Oreos for the top of your brownie.
- Pour half the batter into the lined brownie tin, and scatter over half of the fresh raspberries. Pour over the remaining brownie batter and gently smooth over with an angled spatula. Place the remaining Oreos on top of the brownie pushing them into the batter a little. Place the remaining fresh raspberries between the Oreos.
- Bake the brownies for 30-35 minutes until firm but still a little gooey in the centre. Test the brownies with a skewer after 25 minutes. Make sure you check the brownie about 1-inch from the edge of the pan; if it comes out with moist crumbs then its ready; if its still gooey bake for another 5 minutes and test again.
- Leave the brownies to cool in the pan for 10-15 minutes, then lift out using the baking parchment and leave to fully cool on a wire cooling rack.
- For perfect slices, once they are fully cooled pop the brownies in the fridge for 30 minutes to chill before cutting into pieces. They will be firmly set and you will end up with nice straight edges.
Notes
- How many do these brownies serve? A 9-inch cake pan or brownie pan will make about 16 slices.
- How to store these brownies? Because they contain fresh fruit, the brownies are best stored in an air-tight container in the fridge.
- How long will the brownies keep? The brownies are best eaten in 3 days, but will keep up to 5 days in an air-tight container.
- Can you freeze the brownies? Yes! Once fully cooled, slice the brownies and wrap them in baking parchment before placing in a freezer-proof container. They will keep for 1-2 months. Remember to fully defrost the brownies before eating.
Nutrition
DISCLAIMER
The nutritional information provided is approximate and is calculated using online tools. Information can vary depending on various factors, but we have endeavoured to be as accurate as possible.

