
A chocolate-lover’s dream, this Mini Egg brownie tart is the perfect dessert for Easter. A decadent, fudgy brownie filling and a layer of luxurious caramel sit in a sweet, crisp chocolate pastry tart shell. Switch out the chocolate eggs for the ultimate chocolate dessert for any occasion.


Lou’s recipe overview
SKILL: Intermediate
TASTE: Rich, chocolate and caramel with buttery pastry
PROS: Perfect Easter lunch dessert
CONS: Having to share it!
It’s confession time again…
Yes, I’m here to hold my hand up and admit that I have absolutely no shame when it comes to chocolate dessert fillings.
This time, the spoon, leftover brownie batter and me were left alone in a quiet kitchen just all staring at each other at the end of a Kitchen Live episode. The oven was still warm, and…
Well, I shoved that leftover brownie batter into a dish, dolloped in a tablespoon of caramel and baked it. 10 minutes later, there was vanilla ice cream melting on top of it and… do I need to explain the rest?
That’s how good this Mini Egg brownie tart is; anything leftover you can sit and indulge yourself while no one else is watching. But, shhhh don’t tell them else they’ll all want a taste.
Anyway, I know you’re ready to get stuck in, so let’s go!

As always, if you want to skip the essential recipe info to absolutely nail this Mini Egg brownie tart then skip on down to the printable recipe card.
Why you’ll love this Mini Egg brownie tart
Just look at it, the chocolate, the caramel, the chocolate! Of course you’re going to love it but in case you need some extra persuasion…
- The easy-to-make light and crisp chocolate pastry
- The decadent, rich and slightly gooey brownie filling
- The luxurious ripple of sweet, thick caramel
- And all those Mini Eggs on top… so long as you don’t eat them all beforehand
Do I have to make the pastry?
This is the number one question I’m always asked when it comes to my tart recipes, and the answer is ‘no, you don’t’. Making pastry isn’t everyone’s favourite baking task; whether it’s getting your hands covered in dough, the waiting time for the pastry to chill, or that risk of the dread soggy bottom.
I’d really urge you to give this one a try. It’s the same perfect chocolate pastry I use for my Baileys chocolate tart. It takes 5 minutes to make and if you follow the instructions you’ll get beautiful crisp pastry and not a soggy bottom in sight.
But if you’re really not a fan of making your own pastry, here’s some alternatives:
- Store-brought Pastry Cases – These are a great time saver and also someone has done all the prep work giving you a perfect finish. You’ll typically find these in the baking aisle and just a regular plain pastry flavour.
- Biscuit Tart Case – Just like in my toffee apple pie, you can make a tart case using crushed up biscuits and a little bit of melted butter. For the brownie tart, I’d use either Oreo cookies or Digestive biscuits, but the choice is yours.

What You Need to Make This Brownie Tart
View my Amazon shopping list with equipment and ingredients
Given the fact that I’m suggesting you make the pastry for this tart, you would be forgiven in thinking that I’m also going to arm you with all manner of ingredients and equipment. But you’d be wrong!
Actually even though we are making the pastry tart and the brownie filling, what you need is really basic; so there’s really no excuse. Here’s what you’ll need…
The Ingredients
For the pastry
This is a standard sweet shortcrust pastry but we’re making it chocolate; and you’ll get awesome results.
- Salted Butter – Make sure that it is fridge cold for a light and crisp pastry. I cut mine into cubes and then chill again so I have less time handling the butter before rubbing in. You can use unsalted butter if you prefer, just add a pinch of sea salt.
- Icing Sugar or Powdered Sugar – This will give you a smoother pastry than if you used regular granulated sugar.
- Plain Flour or All-Purpose Flour
- Cocoa Powder – Try to use an unsweetened cocoa powder so you do not add any extra sugar.
- Egg Yolks – You can use a small whole egg if you prefer, but using the yolks on their own give you a richer tasting pastry.
For the brownie filling
This is a simplified version of a full-on brownie batter. We don’t need as much and want it to be a little firmer, but still gooey in the middle.
- Chocolate – The darker the better for me; I use a dark chocolate such as 70% cocoa. You can use a milk chocolate if you prefer.
- Salted Butter
- Caster Sugar or Superfine Sugar – Try and avoid granulated sugar as it is too coarse and will cause the top of your brownie tart to crack all over.
- Eggs – As I always recommend, make sure these are at room temperature before using as they will be easier to whisk up.
- Cocoa Powder – Use the same one as you used for the chocolate pastry. I’ve used a dark cocoa powder for extra richness.
- Plain Flour or All-Purpose Flour – You don’t want your filling to puff up too much and spill out of the tart case, so plain flour is perfect. The eggs will give you all the rise you need.
- Caramel – You can either use store-bought caramel, dulce de leche or you can try making your own homemade caramel sauce, it’s really easy!
- Mini Eggs – You can’t have a Mini Egg brownie tart without them!
Recommended ingredients


Check out Substitutions for my flavour swap ideas
The Equipment
To make the recipe, you don’t need any fancier than a couple of mixing bowls, rolling pin, balloon whisk and a tart tin.
I make my pastry by hand, but if you prefer not to get stuck in then you can use a food processor instead or to save on the washing up, a pastry blender.
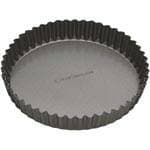
If you’re not sure what tin to use, I highly recommend a loose-based tart tin, and this recipe works well with either:
Recommended equipment


How to make the ultimate brownie tart
Full measurements and instructions can be found on the printable recipe card
Now I really recommend that you take a read through the notes I’ve added in below; they have some handy notes to help you make the best tart. And I promise, it’s really super easy to make.
The chocolate pastry
Grab a large mixing bowl and sieve together the dry ingredients – the flour, icing sugar and cocoa powder.
Add in the fridge-cold butter and gently rub everything together with your fingertips, until you end up with a fine sandy texture.
Next add in the egg yolks, and bring everything together to form a dough. If you need a little extra liquid to help bind the pastry, add a drop of ice cold water. Be careful not to add too much, otherwise it will become too sticky.
When the dough is ready, wrap it in cling film or plastic wrap and chill in the fridge for at least one hour.
TOP TIP: Don’t overwork the pastry when mixing as the gluten in the flour will developer more giving a dense pastry when baked.
Before rolling the pastry out, let it come up to room temperature for 10 minutes. This makes it easier to roll and helps to stop the pastry from tearing.
Roll out the pastry on a lightly floured work surface to about 3-4mm thickness, then carefully lift pastry over your tart tin. Gently press the pastry into the bottom and sides of the tin, being careful not to stretch the pastry.
Rest the tart case in the fridge for 30 minutes, before baking for 20 minutes.
TOP TIP: Allow an overhang of pastry over the top of the tart tin to allow for shrinkage. When completely cooled, use a serrated knife to carefully trim the tart case.
The brownie filling
While the tart case is baking, you can quickly whip up the brownie filling.
Start off by melting together the chocolate and the butter. You can do this in the microwave in 30 second blasts, or in a heatproof bowl over a saucepan of simmering water, as a double boiler. Allow the mixture to cool slightly before using.
In a large mixing bowl, whisk together the caster sugar and eggs for 3-4 minutes, until light, foamy, and pale in colour. I use a balloon whisk as it’s less washing up, but you can use a handheld mixer or stand mixer if you prefer.
Add in the cooled chocolate mixture and mix together with a rubber spatula, making sure everything is well combined. Then sieve in the plain flour and cocoa powder, and fold in. You will end up with a thick but smooth chocolatey batter.
Assembling the tart
Once the tart case has baked and cooled, spoon in the caramel sauce and spread all over the base, with the back of a spoon or an offset spatula.
Next add a layer of Mini Eggs – there’s always room for Mini Eggs!
Then pour over your brownie batter, ensuring that you fill to about two-thirds full. If you add too much into the tart case, you run the risk of the brownie batter escaping all over your oven when baking.
Bake the assembled tart for a further 25 minutes. After the first 20 minutes, press the remaining Mini Eggs into the top of the brownie and return to the oven for the remaining 5 minutes.
Watch: Mini Egg brownie tart – step by step video
Substitutions
This tart is pretty much epic as it is, but here are a few ways you can customise it…
- Easy Tart Case: If you don’t want to make your own pastry, either switch for a pre-made case or even make a super-easy biscuit tart case.
- Gluten-free Tart Case: The easiest way here is to make a biscuit tart case with gluten-free biscuits.
- Fillings: If you’re not a fan of caramel, why not swap it for a layer of chocolate spread like Nutella, or you could try a layer of peanut butter. If you wanted something fruity, a thick spread of raspberry puree or jam would work perfectly with the brownie filling.
- Toppings: I love Mini Eggs so it was no contest for me, but you can add anything as your topping. Why not try peanut M&Ms, Smarties, Reeses Pieces or just fresh raspberries. Remember to add them in, in the last 5 minutes of baking.
While this is my go-to Easter bake, this chocolate caramel brownie tart is honestly too good to save for once a year. Swap out the Mini Eggs for whatever you fancy – Maltesers, peanut M&Ms or a scattering of sea salt flakes – and you’ve got an effortlessly impressive chocolate dessert for any occasion. The caramel layer is what really makes it, so don’t skip that.
Mini Egg Brownie Tart – Your Questions Answered
What size tart tin should I use for this brownie tart?
This recipe works with either a 9-inch (23cm) round tart tin or a 14×5 inch (36×13cm) rectangle tin. You can also divide the mixture between 6 individual tart tins if you prefer individual portions.
How many people does this Mini Egg brownie tart serve?
The tart serves between 10 and 12 slices. If you make it in 6 individual tart tins, each tin makes one portion.
How should I store the brownie tart?
Store the tart in an airtight container at room temperature. It will keep for up to 5 days, but is best eaten within 3 days.
Can I freeze the Mini Egg brownie tart?
Yes, you can freeze the pastry case on its own once baked and cooled, or freeze the completed tart. Make sure it is fully cooled before freezing and wrap it well in cling film. Allow the tart to fully defrost at room temperature before serving.
Do I have to make the pastry from scratch?
No – you can use a store-bought pastry case if you prefer. Look for them in the baking aisle; a plain shortcrust case works well. Alternatively, make an easy biscuit tart case using crushed Oreos or digestive biscuits mixed with a little melted butter.
Do brownies need baking powder?
No – this brownie tart recipe doesn’t use baking powder or bicarbonate of soda. The lift and texture come from whisking the eggs and sugar together for 3–4 minutes, which incorporates air into the batter. Adding baking powder would change the texture, making it cakey rather than the dense, fudgy result you want in a brownie.
What can I use instead of Mini Eggs?
Mini Eggs can be swapped for any chocolate topping that appeals to you. Peanut M&Ms, Maltesers, Smarties, Reese’s Pieces or white chocolate chips all work brilliantly. You can also leave the top plain for a sleek, classic chocolate finish. Swapping the topping turns this into a great chocolate caramel brownie tart for any time of year – not just Easter.
What should I do if my brownie tart looks undercooked?
A slight wobble in the centre of the tart when you remove it from the oven is completely normal – the brownie will continue to firm up as it cools. If it looks very underdone, return it to the oven in 5-minute increments and test with a toothpick. The toothpick should come out with moist crumbs (not wet batter). Be careful not to overbake, as this will give you a dry, cakey texture instead of the fudgy result you want.
What can I do with leftover pastry?
f you have leftover chocolate shortcrust pastry after lining your tart tin, don’t waste it! Roll out the scraps, cut into small rounds and bake as chocolate biscuits (around 12–15 minutes at 180°C). You can also press the leftover pastry into mini tart tins for individual chocolate tart shells, or use it to make small jam tarts with your favourite filling.

Tips for the Best Chocolate Brownie Tart
Whether you’re a fan of making pastry or a lover of a perfect brownie, here are my top tips to getting the perfect brownie tart everytime!
Hints for making the pastry case
- Always chill your pastry – Don’t be tempted to skip this part, it is vital for crisp, sweet pastry. If you skip the chill, the butter will be too soft and you risk your pastry shrinking when baking and that dreaded soggy bottom. Remember to chill the pastry for 1 hour before rolling out, and a further 30 minutes when you have lined the tart tin.
- Roll the pastry between clingfilm or greaseproof paper – This is a super top tip as it stops you from over-flouring your pastry. Lay the pastry between the clingfilm and roll away. It also makes it easier to turn the pastry for an even thickness.
- Don’t overwork your pastry – I know you want to get the perfect thickness and lined tin, but handling your pastry too much will cause to become dry and crumbly. So gently work your pastry and you’ll get a perfect crisp texture.
Top tips for the best brownie filling
- Make sure to whisk the eggs and sugar well – There is no added raising agent in the brownie batter, whisking the eggs well helps to incorporate air into the batter and give them a lift. Three minutes should be plenty of time, but no less.
- Don’t be tempted to over bake – We still want a fudgy brownie texture, so stick to the recipe timings and test with a toothpick in case you need just a little longer. But don’t go too far else you’ll end up with a cakey texture instead.
- Allow the brownie tart to fully cool – I know it smells amazing but you need to let the tart cool in the tin before lifting out to fully cool on a wire rack. This way you’ll end up with a fudgy brownie filling and perfect slices, rather than one that just falls apart.

More Easter chocolate recipes to try
If you liked this Mini Egg brownie tart recipe here are some other recipes that I think you’d enjoy…


Mini Egg Brownie Tart
Ingredients
For the Pastry
- 175 g Plain Flour or All Purpose Flour
- 85 g Icing Sugar or Powdered Sugar
- 50 g Cocoa Powder Unsweetened
- 140 g Butter Salted, Fridge Cold
- 2 Egg Yolks
For the Filling
- 150 g Dark Chocolate 70% cocoa if possible
- 50 g Butter Salted
- 85 g Caster Sugar or Superfine Sugar
- 2 Eggs Room temperature
- 50 g Plain Flour or All-Purpose Flour
- 2 tbsp Cocoa Powder
- 50 g Caramel Sauce or Dulce de Leche/ Carnation Caramel
- 200 g Mini Eggs
Instructions
- To make the pastry – Sieve the flour, icing sugar and cocoa powder together into a large mixing bowl. Cube the butter and add into the mixing bowl.
- Using your fingertips, rub the butter into the dry ingredients, until it is a sandy texture. Alternatively you can pulse the ingredients together in a food processor.
- Add the egg yolks, and using a knife bring the ingredient together until it starts to form a pastry dough. You might need to use your hands to finish bringing the pastry together.
- If the pastry is too dry, add a drop of ice cold water to help the pastry bind.
- Form the pastry dough into a disc, and wrap in cling film or plastic wrap. Chill in the fridge for at least 1 hour, or overnight.
- To make the tart case – Allow the pastry to come up to room temperature before rolling out. Then lightly dust your work surface and rolling pin with flour
- Roll the pastry out so it is larger than your tart tin, and about 3-4mm in thickness.
- Using the rolling pin, lift the pastry over the tart tin and gently press the pastry into the base and sides, being careful not to stretch it. Trim off the excess pastry allowing for a slight overhang for shrinkage when baking.
- Chill the tart case for 30 minutes before baking.
- Preheat oven to 180C/ 350F. Lie a sheet of baking parchment on the base of the tart case and fill with baking beans, pie weights or uncooked rice.
- Bake the tart case for 20 minutes, then remove the parchment and beans, and cook for a further 10 minutes.
- Allow the tart case to completely cool in the tin before filling
- To make the brownie filling – Break the chocolate into pieces and place in a heatproof bowl with the butter. Place the bowl over a saucepan of simmering water. Make sure that the bowl does not touch the water. Heat until all the chocolate has melted. Alternatively, melt in the microwave in 30 second blasts. Set aside to cool.
- In a large mixing bowl, beat together the eggs and caster sugar with a balloon whisk or handheld mixer for about 3-4 minutes, until pale and fluffy. Alternatively, whisk together in a stand mixer with the balloon attachment.
- Pour in the chocolate mixture and gently whisk together until the mixture is silky and smooth.
- Sieve together the flour and cocoa powder, and add to the chocolate mixture. Gently fold together with a metal spoon or spatula.
- Assemble the tart – Preheat oven to 180C/ 350F. Add the caramel sauce into the base of the cooled tart and spread evenly all over with the back of a spoon or angled spatula.
- Scatter a handful of Mini Eggs, about 10-12, over the caramel, then pour in the brownie batter to just below the edge of the tart case.
- Bake the tart for 25 minutes, adding the remaining Mini Eggs to the top of the tart for the last 5 minutes. When adding the Mini Eggs you will need to push these down breaking through the baked brownie crust.
- Leave the tart to cool in the tin for 15-30 minutes, then remove from the tin, you can keep the tin base in place, and leave to fully cool on a wire cooling rack.
- Serve with vanilla ice cream or whipped cream. You can also warm in the microwave if you prefer you brownie squidgy.
Notes
What size tart tin should I use?
This recipe will fit either a 9-inch round tart tin or a 14×5 rectangle tin. You can also make it in individual tart tins if preferred.How many does the recipe serve?
The tart will serve between 10 and 12 slices, or make 6 individual tarts.How should I store the tart?
The tart should be stored in an air-tight container at room temperature.How long will the tart keep for?
If stored correctly the tart will keep for up to 5 days, but is best eaten in 3 days.Can I freeze the tart?
Yes! You can either freeze the pastry case on its own when it is baked and cooled, or you can freeze the complete tart. Make sure that the tart is fully cooled before freezing and wrap it well. Allow the tart to fully defrost before eating.Nutrition
DISCLAIMER
The nutritional information provided is approximate and is calculated using online tools. Information can vary depending on various factors, but we have endeavoured to be as accurate as possible.

