
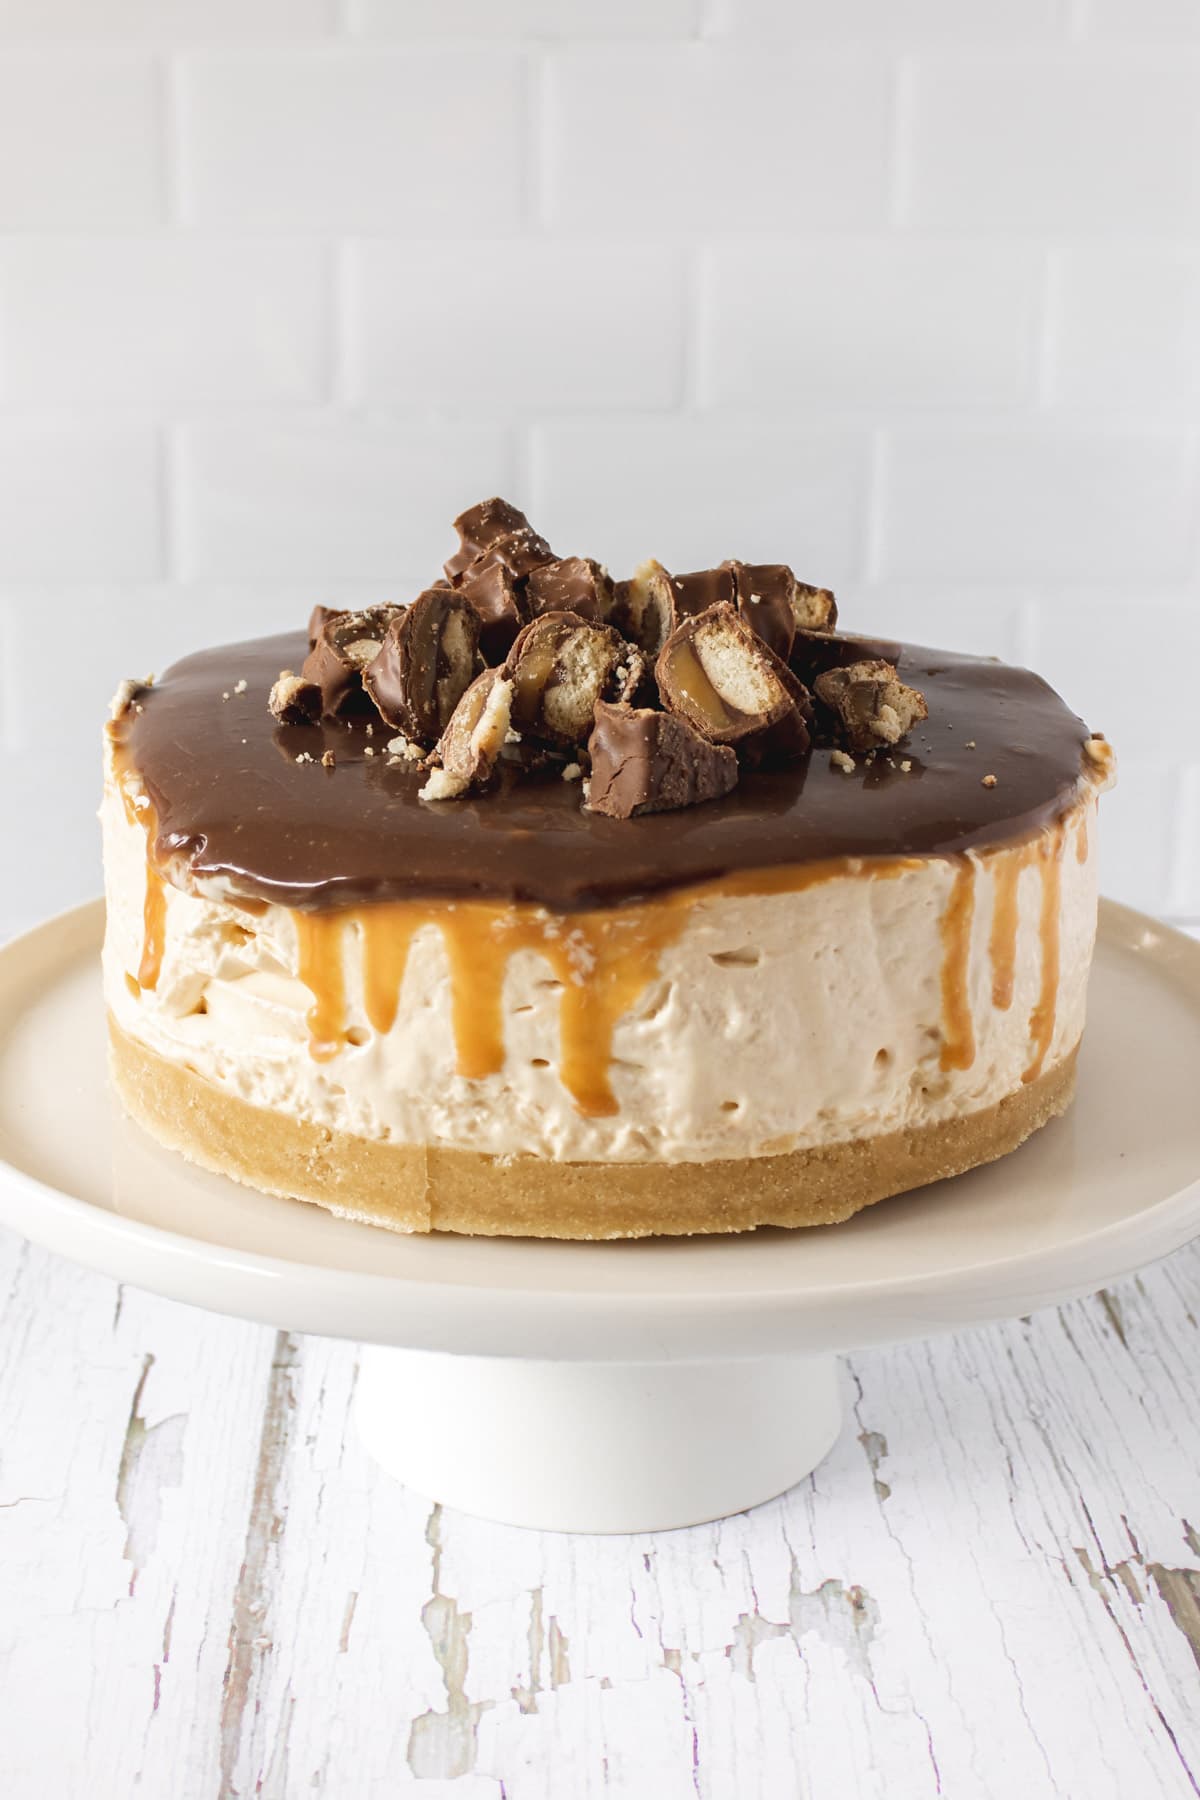
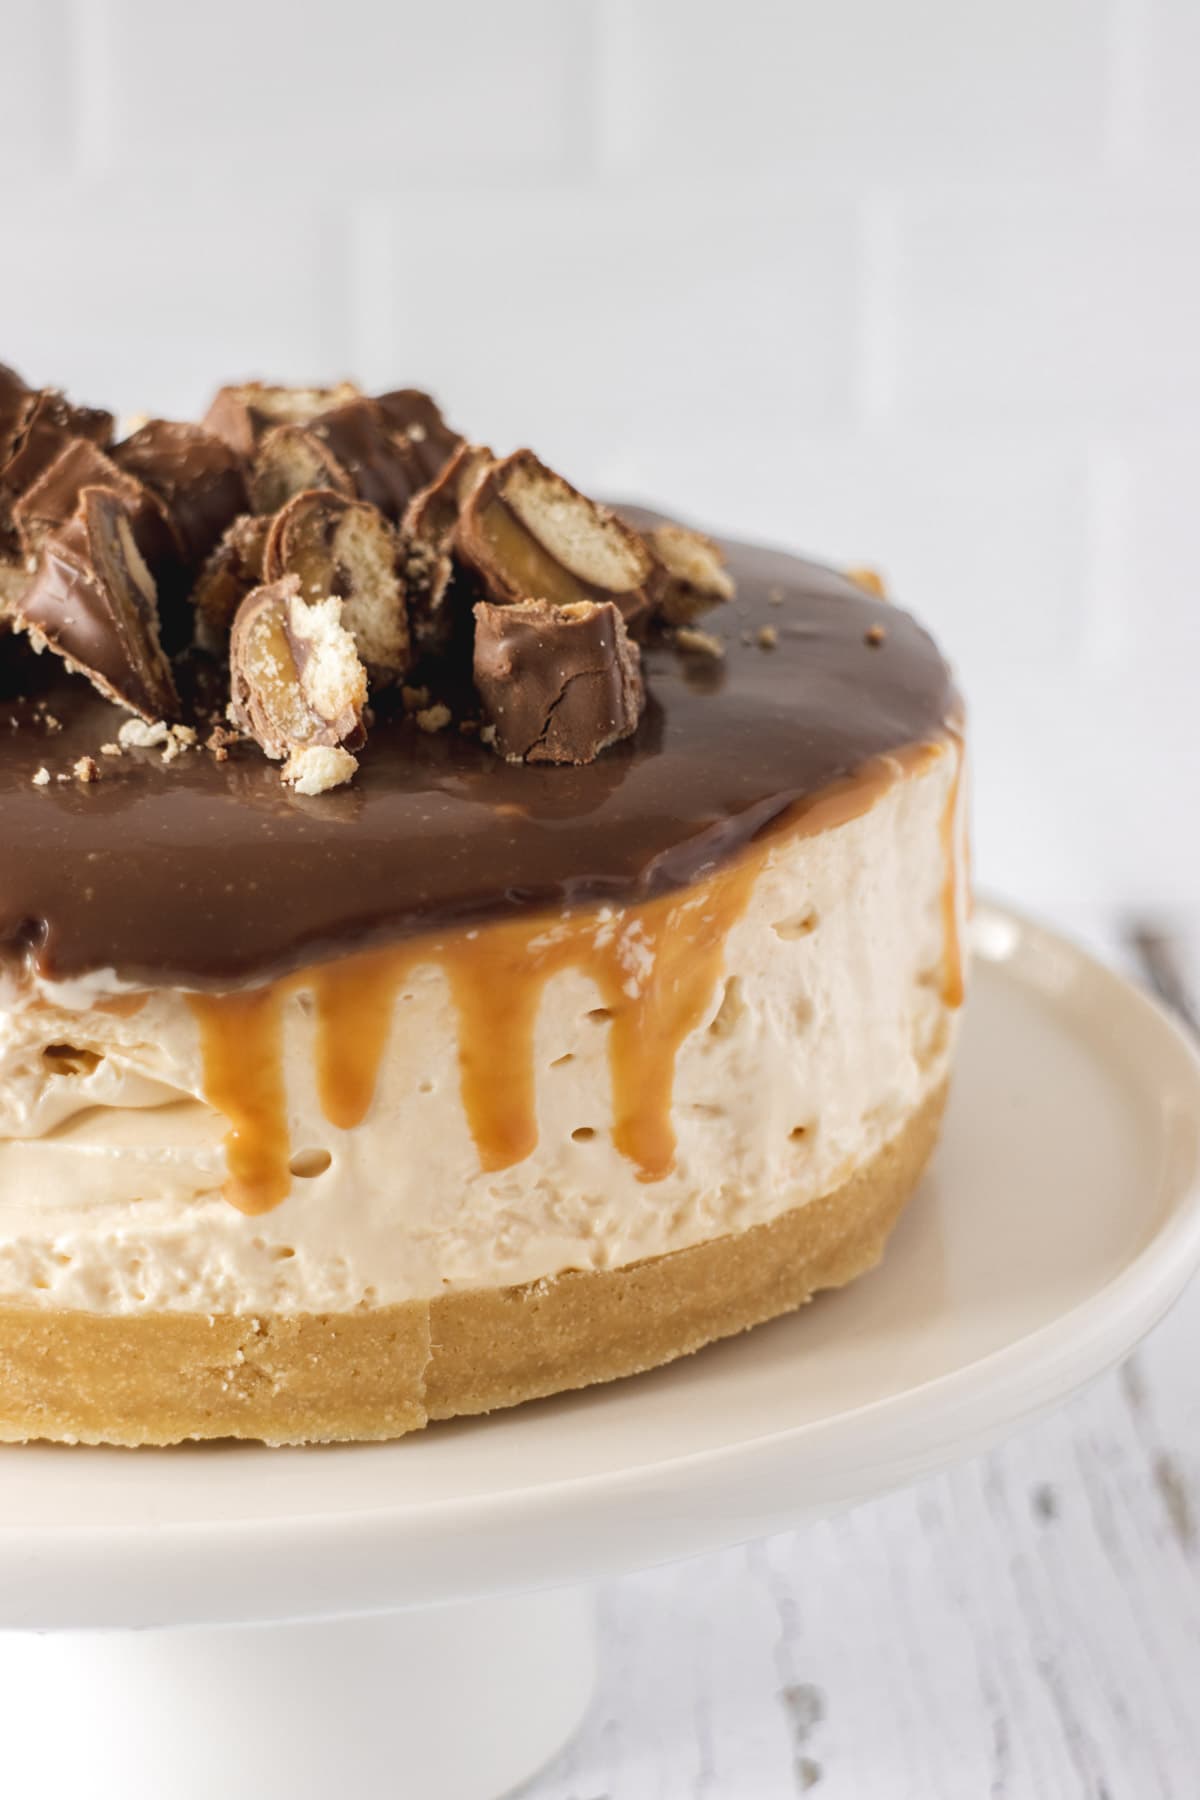
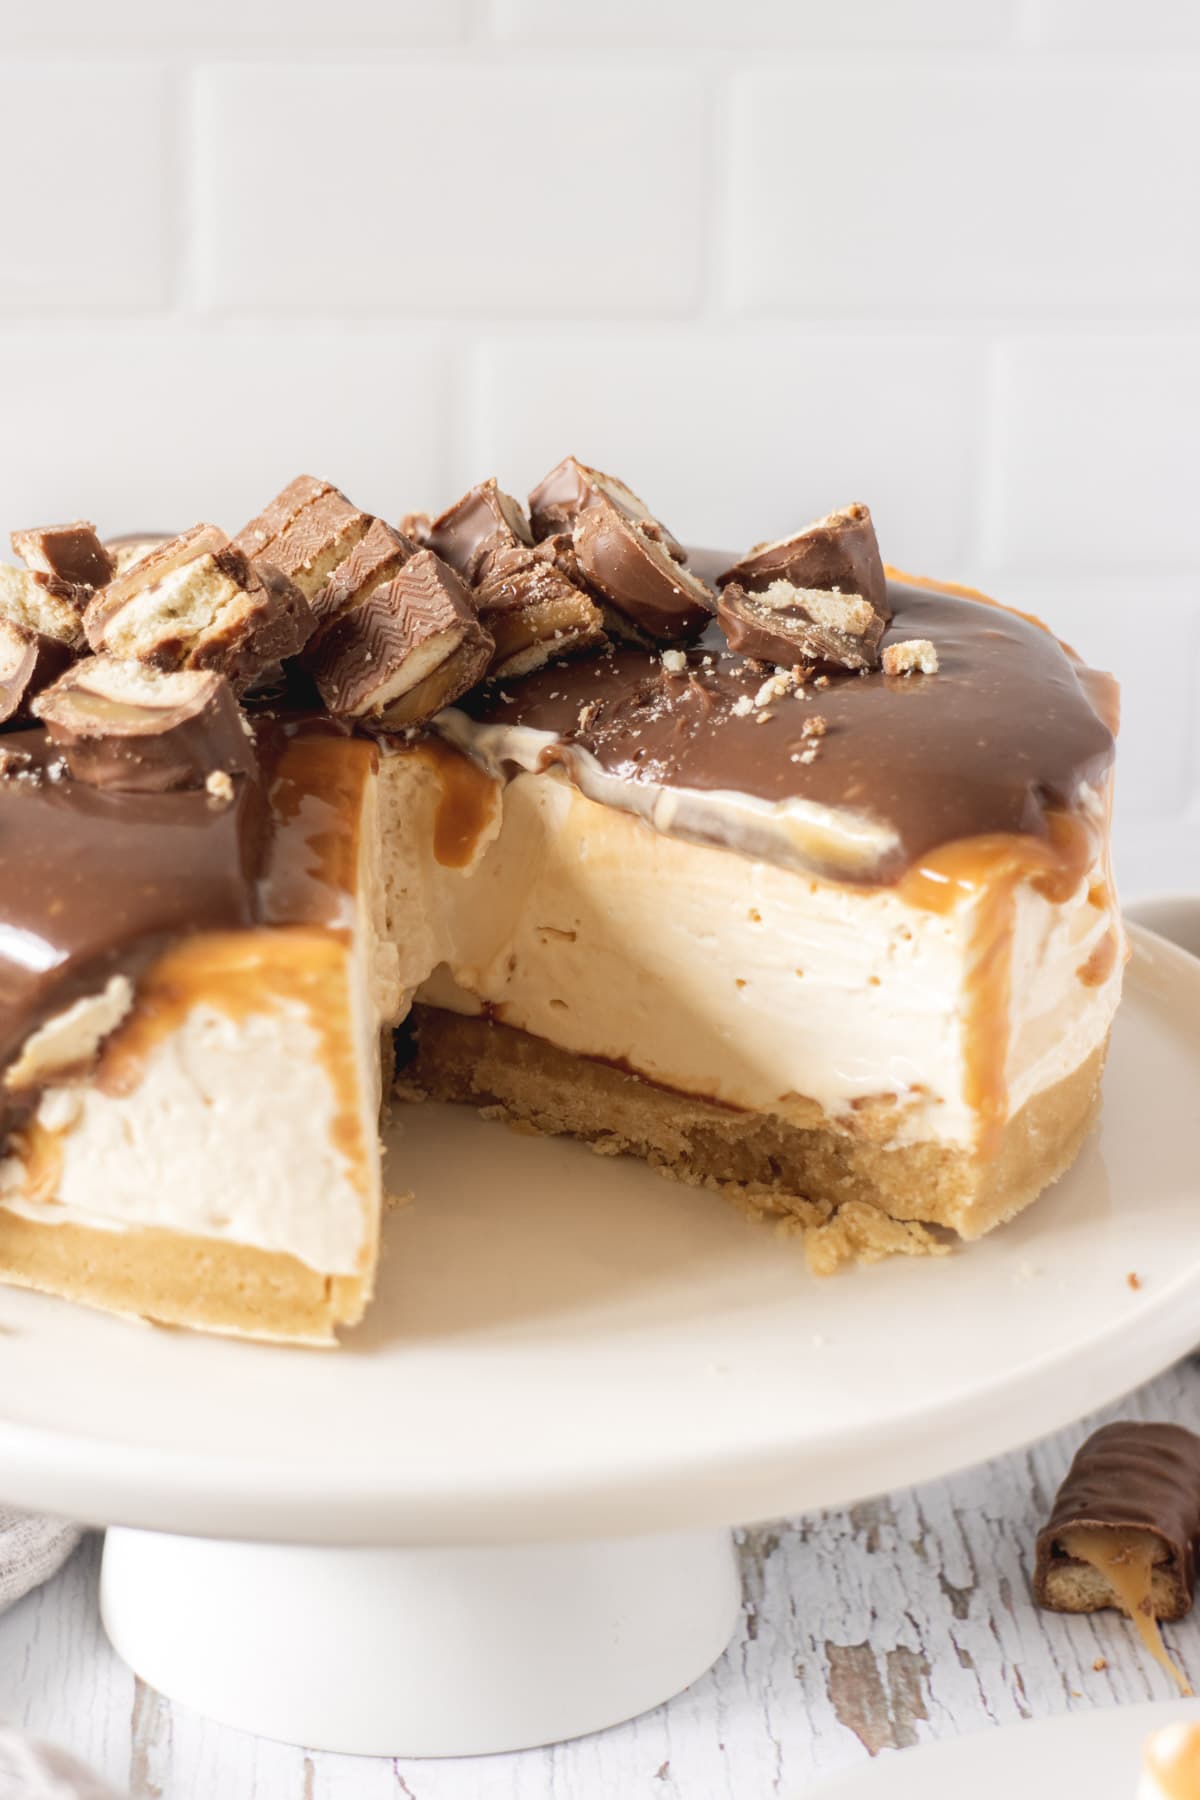
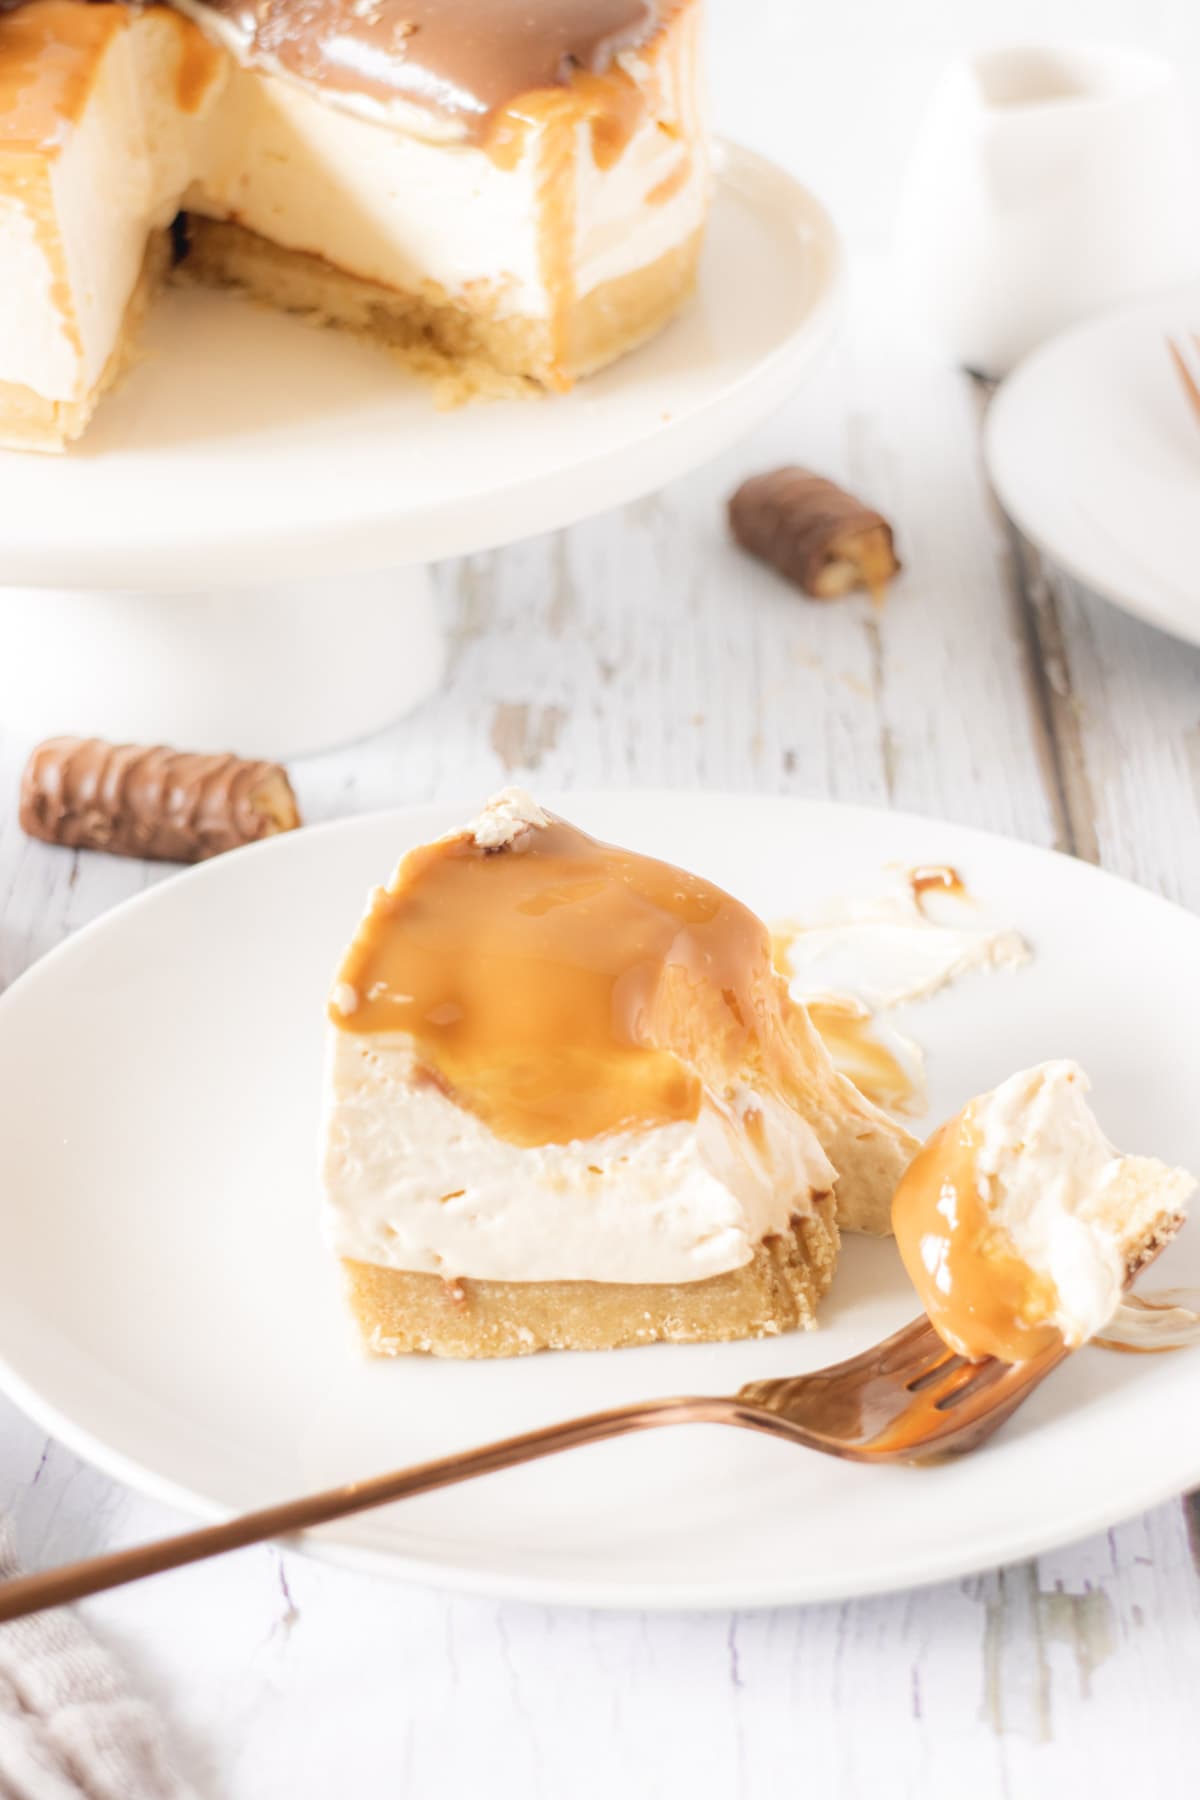
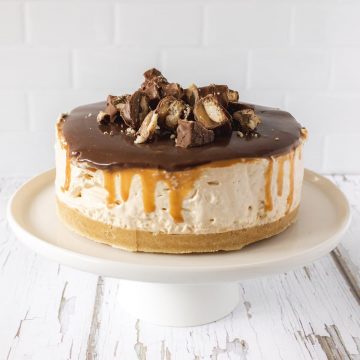
If a Twix bar were a cheesecake, this would be it! Shortcake biscuit base, creamy caramel cheesecake filling, a thick layer of caramel sauce, and a silky chocolate ganache on top – every layer earns its place. It takes about 30 minutes to put together, sets overnight, and never fails to impress. No baking, no gelatine, no fuss.

Lou’s recipe overview
SKILL: Intermediate
TASTE: Sweet caramel and rich chocolate
PROS: All the layers of a Twix in cheesecake form
CONS: Everyone wants a slice – be quick
Today I’ve got for a cheesecake for you, that I’ve been dreaming off making ever since I made my favourite Twix layer cake. And I really can’t actually believe its taken me this long to get around to making it.
If there’s any chocolate bar that hits the spot for me, it’s those shortcake fingers and sweet caramel all covered in chocolate. It’s absolutely crying out to be made into a dessert and this no bake Twix cheesecake is the ultimate way to do so.
I’ve made quite a few chocolate bar inspired cheesecakes now, and you guys just can’t get enough of the really easy, no bake recipes especially my Crunchie cheesecake with the chocolate and honeycomb, or the Malteser cheesecake with those light honeycomb chocolate balls, and my Mint Aero cheesecake which is full of bubbly mint chocolate.
But finally it’s time to give cheesecakes the Twix treatment. I love how all the layers work perfectly as different parts of the dessert. It really is the ultimate no bake cheesecake, and here’s how I do it…

If you want to skip the essential info and handy tips for making the most indulgent no bake Twix cheesecake, then head down to the printable recipe card.
Why this no-bake Twix cheesecake works
Well let’s be honest, how can you not resist that heavenly combination of chocolate and caramel. Just look at that caramel drip, don’t you just want to get stuck in?
And it really does tick the flavour boxes with…
- Silky smooth caramel cheesecake filling; perfectly light and creamy
- Thick buttery shortcake biscuit base, perfect for cheesecake crust fans
- Sweet and indulgent caramel layer to give you the Twix experience
- Quickest and easiest shiny chocolate ganache topping
Not only that, it’s also…
- Quick and easy to make in less than 30 minutes, sit back and relax as it chills
- Absolutely no baking, no waterbaths, no eggs, no gelatin
You gotta believe me when I say it’s one of the easiest cheesecakes you’ll ever make!
Ingredients and equipment for Twix cheesecake
View my shopping list with equipment and ingredients
When it comes to desserts, you know my motto – ‘deliciously easy’ and the simpler they are to make, the better. But that doesn’t mean let’s use a box mix, no not at all.
Instead I want you to get stuck into using simple ingredients, with simple equipment and easy techniques. And there’s no excuses as I’m going to let you know everything you need and guide you step by step through the recipe.
Plus I test my recipes over and over until they are just right before sharing them with you, so you know that they’re going to work.
The Ingredients
Most of the ingredients you might find you already have in the fridge or in the kitchen cupboard. Here’s what you’ll need…
- Full-Fat Cream Cheese – Full-fat cream cheese is super important to make sure the filling sets properly and you get that velvety smooth texture. Use either a block cream cheese or Philadelphia cream cheese and allow it to come up to room temperature to avoid any lumps in your filling. Take the cream cheese out of the fridge 15 minutes before you want to use it and you’ll be good to go.
- Double or Heavy Cream – Just like the cream cheese, the high fat content in cream is vital to help the cheesecake filling set. If you can’t find double or heavy cream, then you can use whipping cream instead.
- Shortcake Biscuits – Shortcake biscuit fingers are the backbone of a Twix so it was only natural to use them as the biscuit base for my cheesecake. But if you can’t find shortcake biscuits or would prefer a different biscuit for the base you can easily swap them.
- Dulce de Leche or Caramel Sauce – I’ve used a ready made Dulce de Leche caramel for this cheesecake as I had some in the fridge that needed using up. However if you want to try your hand at making your own caramel, you can do so but just make sure it is completely cool before adding on top of the cheesecake filling.
- Icing Sugar or Powdered Sugar
- Milk Chocolate
- Unsalted Butter
Salted Caramel Version: If you want to take the caramel layer up a notch, swap the standard dulce de leche for a salted caramel sauce. It cuts through the sweetness of the cheesecake filling beautifully and makes it feel a little more grown-up. You can use a good quality store-bought salted caramel sauce or try my homemade salted caramel recipe.
Recommended Ingredients

The Equipment
Ok, on to the equipment and not only are we using simple ingredients, our equipment list is pretty basic too!
All you need is…
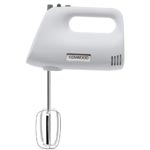
- Large mixing bowl and hand held mixer, or you can use a stand mixer
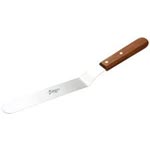
- Angled Palette Knife
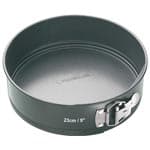
- Springform Cake Pan
I also highly recommend an offset spatula for smoothing the cheesecake filling over. You won’t believe how much easier it is to level off with one!
And to make getting your cheesecake out of the tin nice and easily, you’ll need a springform cake pan. This recipe is best made in an 8-inch pan, to give you a nice deep cheesecake layer.
TOP TIP: Line the springform pan by placing a square of baking parchment over the base plate. Then clamp into place with the springform ring.
Recommended equipment

How to make no-bake Twix cheesecake
Full measurements and instructions can be found on the printable recipe card
Now if you’ve seen some of my other cheesecake recipes, you’ll know just how easy this recipe method is. So there’s no excuse to cut corners or change things around. Just follow the steps and check out my handy tips and the best cheesecake ever will be yours!
The Biscuit Base
First you’ll need to crush the biscuits for the cheesecake base. They need to be crushed as fine as you can until they have a sand like texture. I use a food processor, but you can also break them up into smaller pieces, place in a Ziploc bag and bash them with a rolling pin.
Pop the biscuit crumbs into a large mixing bowl and pour in the melted butter, mixing together to form a sort of crumb dough. Press this into the bottom of your springform cake pan and smooth with the back of a spoon.
Chill the base for 30 minutes to an hour, in the fridge, to firm up.
The Cheesecake Filling
The filling only takes a few minutes to make so you can do this while the base is chilling in the fridge and still have time for a brew!
Grab a large mixing bowl, and add in the cream cheese and the icing sugar, then gently fold together. The cream cheese will start to slacken so don’t mix too hard. Then add in the double cream and whisk with a handheld mixer, until the filling becomes smooth and thick. You should be able to spread it easily. If its too runny and it needs whisking a little more.
Add in the Dulce de Leche or caramel sauce and stir together until evenly distributed.
Pour the cheesecake filling on to the chilled base, and level off using an angled palette knife or the back of a spoon, and pop back in the fridge to set for at least 2 hours before adding the caramel layer.
The Caramel Layer
After about 2 hours, when the cheesecake starts to firm up you can add the caramel layer.
Pour the Dulce de Leche or caramel sauce onto the centre of the cheesecake, then spread with an angled palette knife. Leave about 1cm between the caramel and the edge of the cheesecake.
The Chocolate Ganache Layer
To make the most easiest chocolate ganache ever, pop the chocolate into a heatproof bowl. Then gently heat the cream in a small saucepan over a low heat until it begins to simmer.
Pour the warm cream over the chocolate and stir together until completely melted. Pop the ganache to one side to cool down.
After the cheesecake has chilled for at least 4 hours, pour the chocolate ganache over the top, allowing it to run out to the edges of the cheesecake.
Pop back the cheesecake back in the fridge for a final chill for at least 3 hours or over night..
TOP TIP: When you release the cheesecake from the pan the chocolate will start to drip down the sides of the cheesecake with the caramel – this is the perfect look for me. But if you don’t want drips. leave the chocolate ganache until you are ready to serve and pour over the cake when it is out of the pan. This way you can easily control where the chocolate ganache runs too.

Tips for the best Twix cheesecake every time
I know I’ve gone on about how simple the recipe is and how it uses simple ingredients and equipment; and it is 100% deliciously easy. However I want to share with you some of my notes and top tips that if you follow will give you the best cheesecake every time you make it.
Ingredients and Equipment
- Invest in a springform cake pan – Number 1 top tip alert! Have you ever tried to get a cheesecake out of a normal cake pan? Don’t even try, you’ll end up in such a sticky albeit delicious mess. However, if you use a springform cake pan you can easily release the cheesecake without the mess. I add a layer of baking parchment beneath my biscuit crust so I can easily slide the cheesecake onto a serving plate.
- Start with room temperature cream cheese – Take the cream cheese out of the fridge 10-15 minutes before you want to use it. Cold cream cheese can create lumps in your filling. It also gives your cheesecake a lighter creamier texture as when you whisk it with the cream it easily incorporates air into the mixture.
- Use full-fat cream cheese – I can’t say this one enough, it is super super important as it helps the cheesecake filling stabilise and set. It’s best to use either a block-style cream cheese if available or Philadelphia cream cheese.
- Use double, heavy or whipping cream – Just like the cream cheese, the fat content is important to set the filling. The higher the fat content, the thicker you can whip the cream which is needed to hold the filling together.
- Salted caramel is a great upgrade – Swapping to a salted caramel sauce adds a subtle savoury note that works really well against the sweetness of the cheesecake filling. Just make sure it’s completely cool before adding it to the top of the cheesecake.
Getting the filling and layers right
- Don’t over beat the filling – Be gentle when it comes to your cheesecake filling, If you beat the filling too much, the cream will become grainy and the cream cheese will become slack and runny. You want it to be thick and creamy, but smooth enough to spread easily with a palette knife.
- Don’t under beat the filling – And that said, you also don’t to under whisk the filling. If you don’t beat the filling enough, the cream will not thicken up which will result in a runny cheesecake filling that will not stabilise and set properly.
- Be patient and chill – It’s vital that you let the cheesecake chill in the fridge for at least 6-7 hours before serving. Remember you can always make the cheesecake the day before, and chill overnight.
Frequently asked questions
What size pan do I need to use?
The cheesecake is best made in an 8-inch springform cake.
How many does the cheesecake serve?
The cheesecake will serve 10-12 portions, depending on the size you slice them.
How should I store the cheesecake?
Once the cheesecake has set and you have added caramel and chocolate ganache layers, loosely cover the cheesecake either with cling film or kitchen foil. The cheesecake should then be keep chilled in the fridge. It’s best to keep the cheesecake in the tin until you are ready to serve.
How long will with cheesecake keep for?
If stored correctly, the cheesecake will keep for up to 3 days.
Is it possible to freeze the cheesecake?
Yes, you can freeze the cheesecake for up to 3 months. Before freezing, make sure to wrap the cheesecake with cling film/ plastic wrap and a layer of kitchen foil. This helps protect from freezer burn and reduces the potential for ice crystals forming in the filling. Remember to allow the cheesecake to defrost in the fridge before serving.
My cheesecake is runny, why has it not set?
There are a number of possible reasons that your cheesecake has not set and it’s hard to diagnose over the internet. It could be anything from the ingredients to the weather but the most common reason is that the filling hasn’t been whipped enough.
Can I make this as individual mini cheesecakes?
This recipe works really well as individual portions. Divide the biscuit base between small glasses, ramekins, or a silicone cupcake tray, pressing down firmly. Fill with the cheesecake mixture and chill as normal. Individual portions will set faster – around 3–4 hours should be enough. Add the caramel and ganache topping just before serving.
Can I use a different biscuit for the base?
Shortcake biscuits are the best choice here as they echo the shortcake finger in a Twix bar – but digestive biscuits, Hobnobs or Rich Tea biscuits all work well as alternatives. If you want to go all-in on the Twix flavour, you could even use crushed Twix bars as part of the base mixture alongside butter, though it will be much sweeter.

More chocolate and caramel recipes to try
If you liked this no-bake Twix cheesecake, here are some other chocolate and caramel recipes I think you’d love…


No Bake Twix Cheesecake
Ingredients
For the Cheesecake
- 250 g Shortcake Biscuits
- 75 g Butter Unsalted, Melted
- 500 g Cream Cheese Full Fat
- 75 g Icing Sugar or Powdered Sugar
- 300 ml Double Cream or Heavy Cream
- 2 tbsp Caramel Sauce or Dulce de Leche
For Toppings
- 100 g Milk Chocolate
- 100 ml Double Cream or Heavy Cream
- 4 tbsp Caramel Sauce or Dulce de Leche
- 4 Twix Fingers
Instructions
- Make the biscuit base – Add the shortcake biscuits into a food processor, and blitz until they form a sandy texture crumb, then add to a large mixing bowl. Make a well in the centre of the biscuit crumbs, and pour in the melted butter. You can also crush the biscuits in a ziploc bag and bash them with a rolling pin.75 g Butter
- Mix together until well combined, and then pour into an 8-inch springform tin, lined with greaseproof paper. Press down onto the biscuit base with a spoon and smooth out to the edges, making sure it's well compacted.. Chill in the fridge for at least 30 minutes to 1 hour.
- Make the cheesecake filling – Using a stand mixer with the balloon whisk attachment, gently combine the icing sugar and cream cheese.500 g Cream Cheese, 75 g Icing Sugar
- Add the double cream and whisk together until the cream thickens and the filling is smooth and thick.300 ml Double Cream
- Add the caramel sauce and gently whisk into the filling until well combined.2 tbsp Caramel Sauce
- Alternatively, you can make the cheesecake filling in a large mixing bowl, by hand with a balloon whisk or an electric hand whisk.
- Assemble the cheesecake – Pour the cheesecake filling over the top of the chilled biscuit base, then smooth over and level with an offset spatula. Chill the cheesecake in the fridge for at least 6 hours or overnight.
- Make the chocolate ganache – Break the chocolate into pieces and place in a heatproof bowl.
- In a heavy bottomed saucepan, gently heat the double cream over a low to medium heat. When the cream starts to gently boil, pour over the chocolate and allow it to melt for 1 minute.
- Gently stir together the chocolate and cream, then leave to cool for at least 30 minutes. before pouring over your cheesecake.
- Decorate the cheesecake – Spoon the caramel sauce on top of the cheesecake in the centre and gently spread across the top, leaving at least 1-2cm gap around the edge.When ready to serve, whip up the remaining double/ heavy cream with the icing sugar and pipe on top of the cheesecake. Decorate with the Twix fingers, halved or broken, and an extra drizzle of caramel sauce if desired.
- Leave the cheesecake and caramel to chill in the fridge while the chocolate ganache chills. Then pour the chocolate ganache over the top and leave to chill in the fridge for at least another 30 minutes.
- When ready to serve, remove the cheesecake from the springform pan and slice.
Notes
- Your cheesecake will keep for up to 3 days in the fridge and up to 3 months in the freezer. When freezing make sure you wrap it well with cling film or plastic wrap, and then a layer of aluminium foil to prevent ice crystals forming in the filling. Remember to allow the cheesecake to thaw before serving.
- Use a springform cake pan so you can release your cheesecake without running the risk of damaging it in the process.
- Full-fat cream cheese is a must – a traditional cream cheese, either a block or something like Philadelphia. Don’t be tempted to overbeat your cream cheese, it will slacken and your filling won’t set properly.
- Use room temperature cream cheese to avoid any potential lumps that you might get if it is too cold.
- Whip double or heavy cream so it forms soft, thick peaks, but be careful not to overwhip it. Double cream tends to be quite stable when whipped, but it can vary depending on the type of cream available in your country.
- Too runny? If your cream is not whipping up or seems too runny, try using less cream and more cream cheese. And remember don’t overbeat your cream cheese!
Nutrition
DISCLAIMER
The nutritional information provided is approximate and is calculated using online tools. Information can vary depending on various factors, but we have endeavoured to be as accurate as possible.


Hi! Just wondering can I use this to make individual cheesecakes in small cups as well?
Hi! Yes definitely – it works perfectly as individual cheesecakes. Just divide the base and filling between your cups and chill. If your cups are very small, reduce the chill time slightly as they set faster. Enjoy! 😊
My best friends son requested a Twix cheesecake for his 15th birthday so I found this recipe and made it a couple days ago. The whole family loved it. I didn’t try it but I asked my friend how many stars to give it and she said 5. Very simple to make and it looked beautiful! I’m sure I will be making this again.