
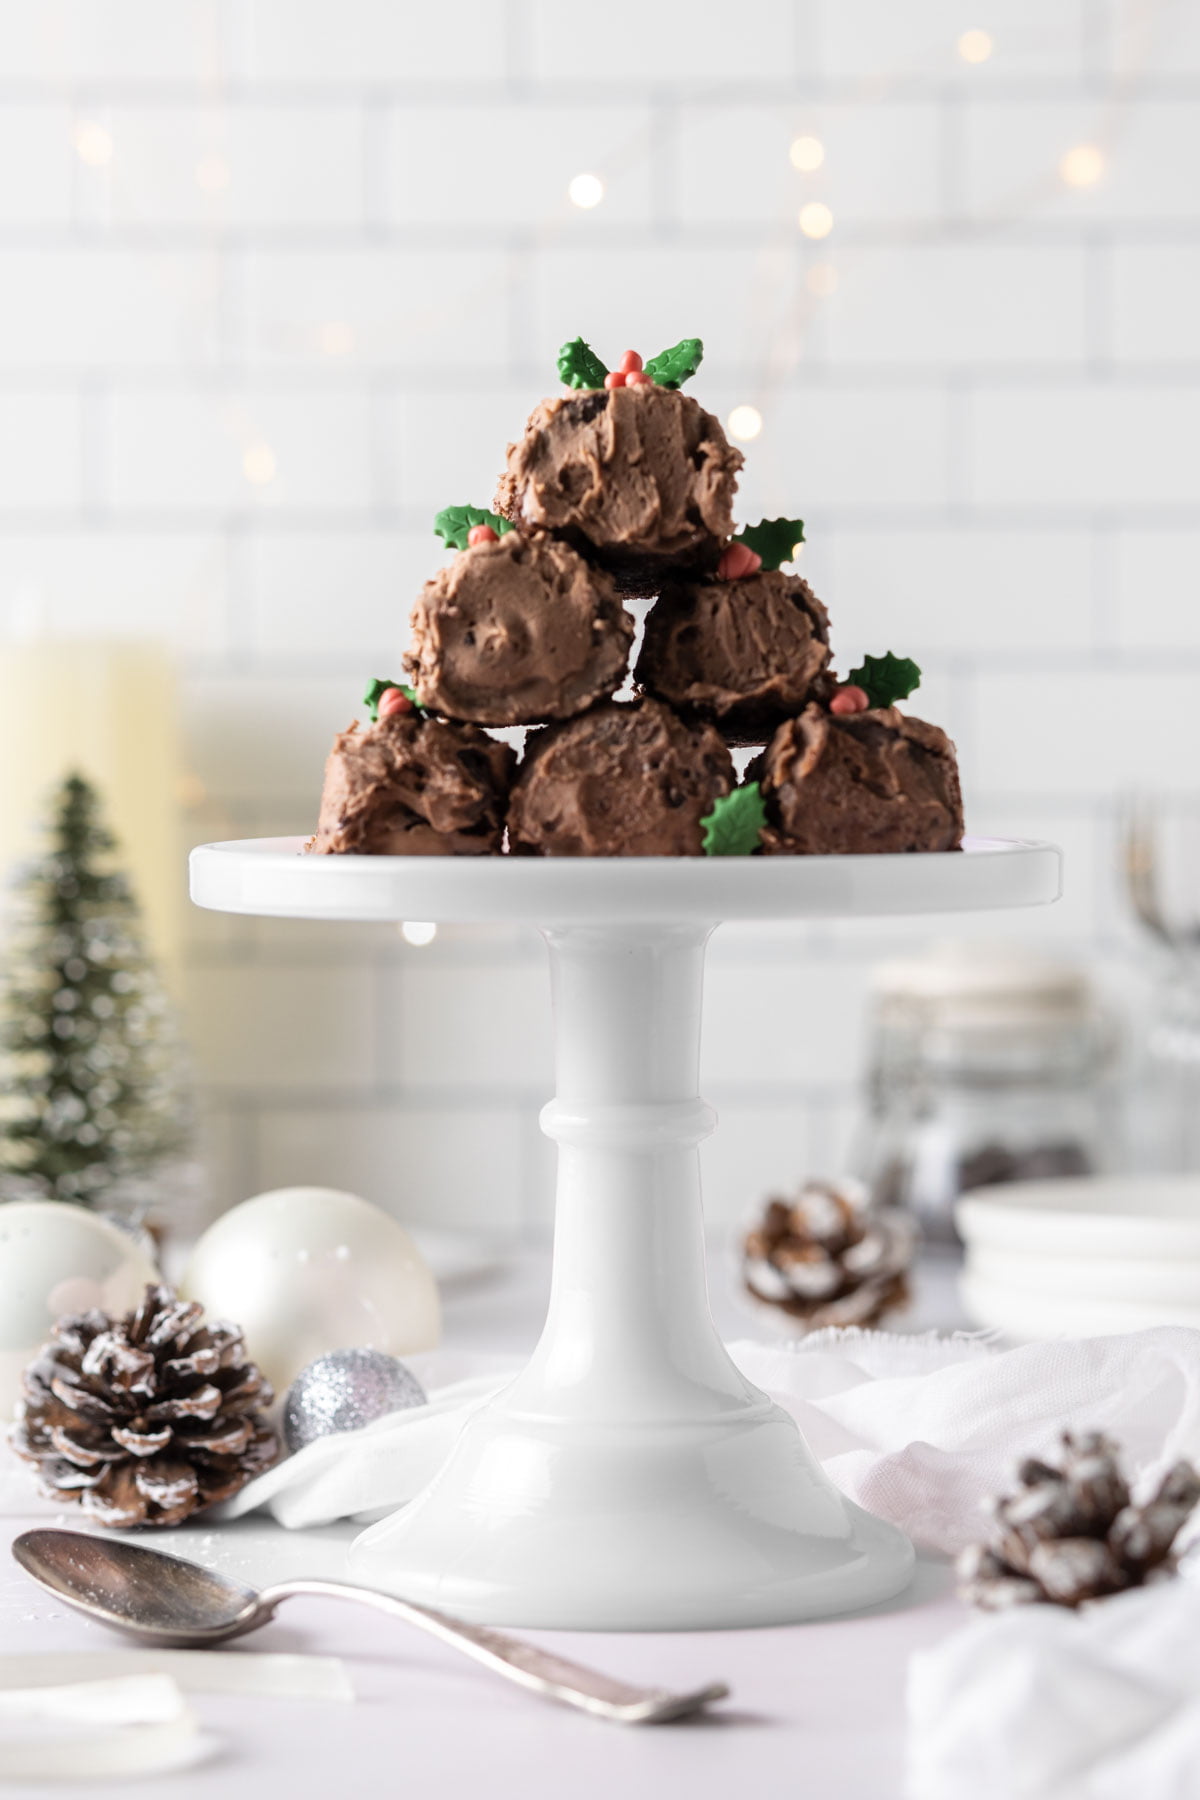
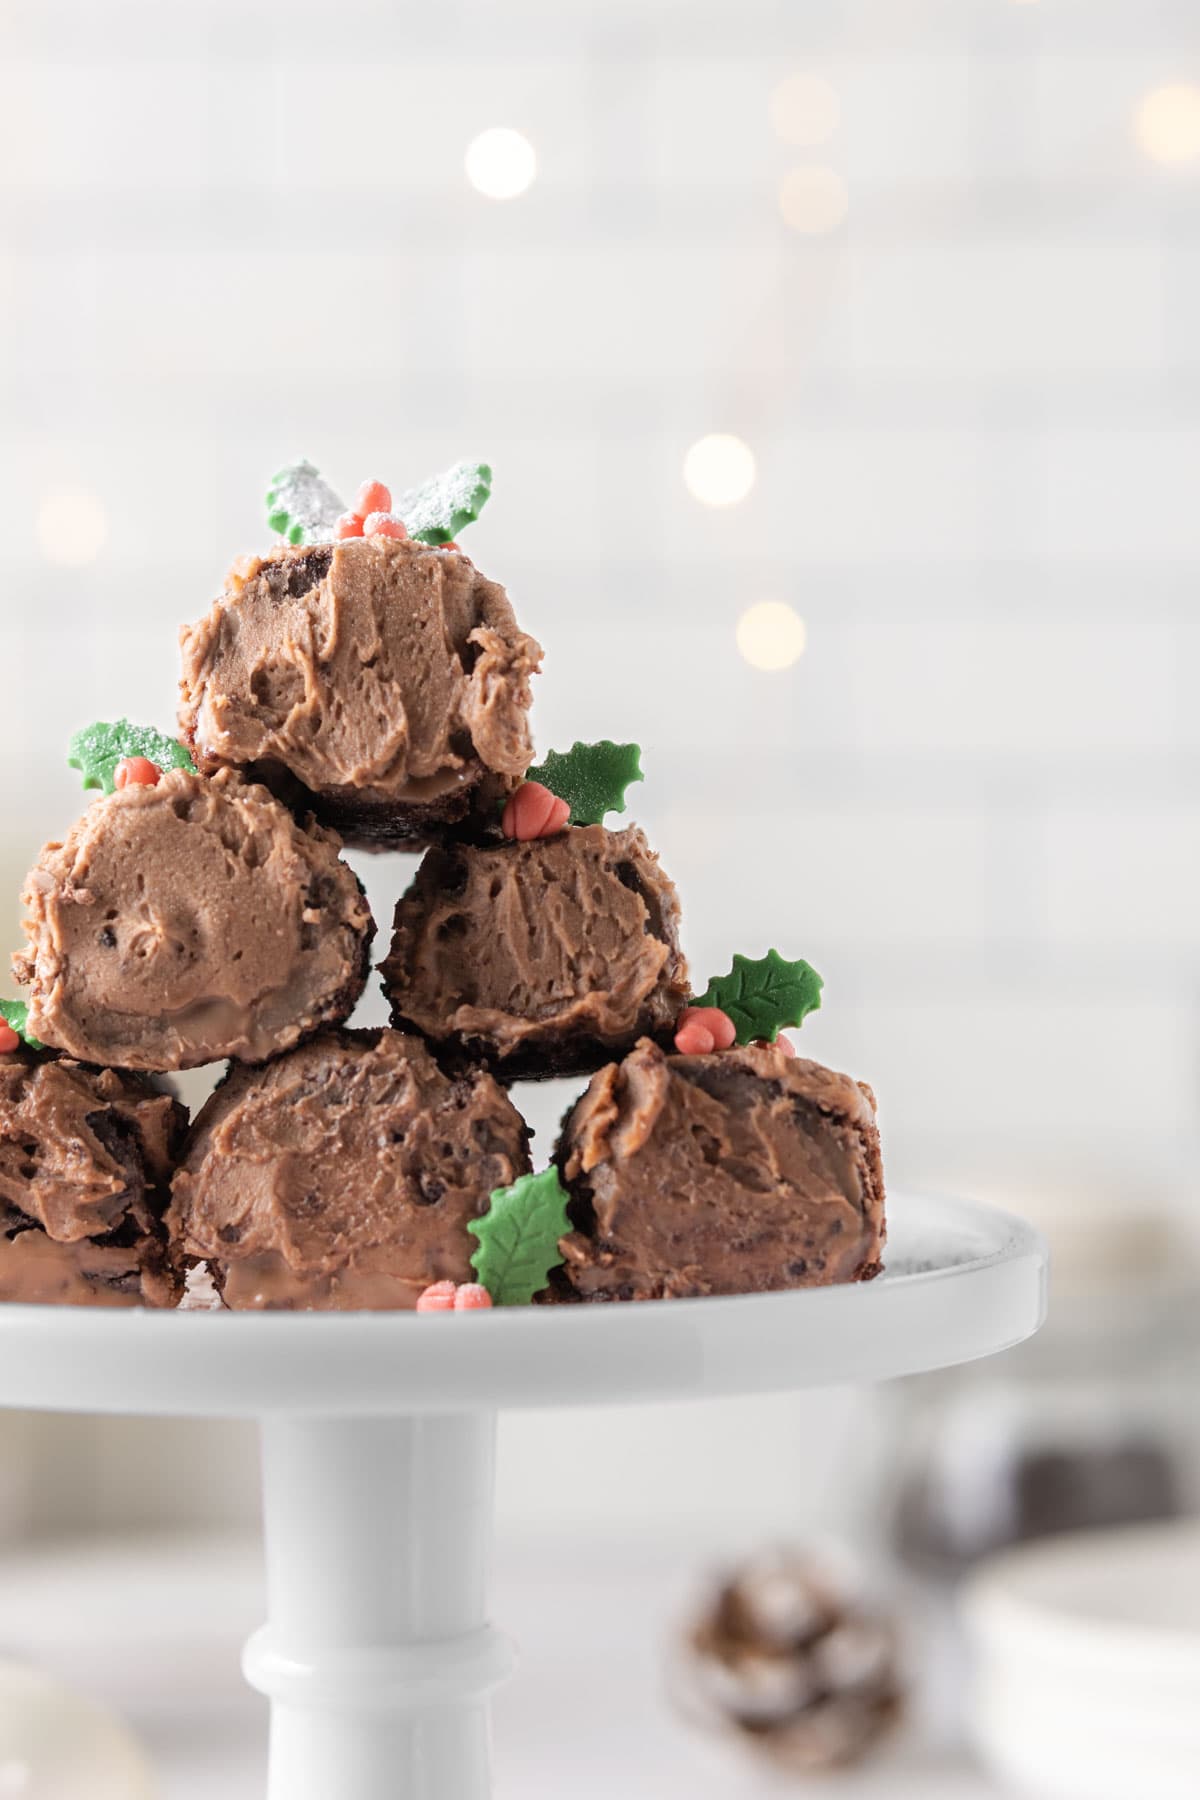
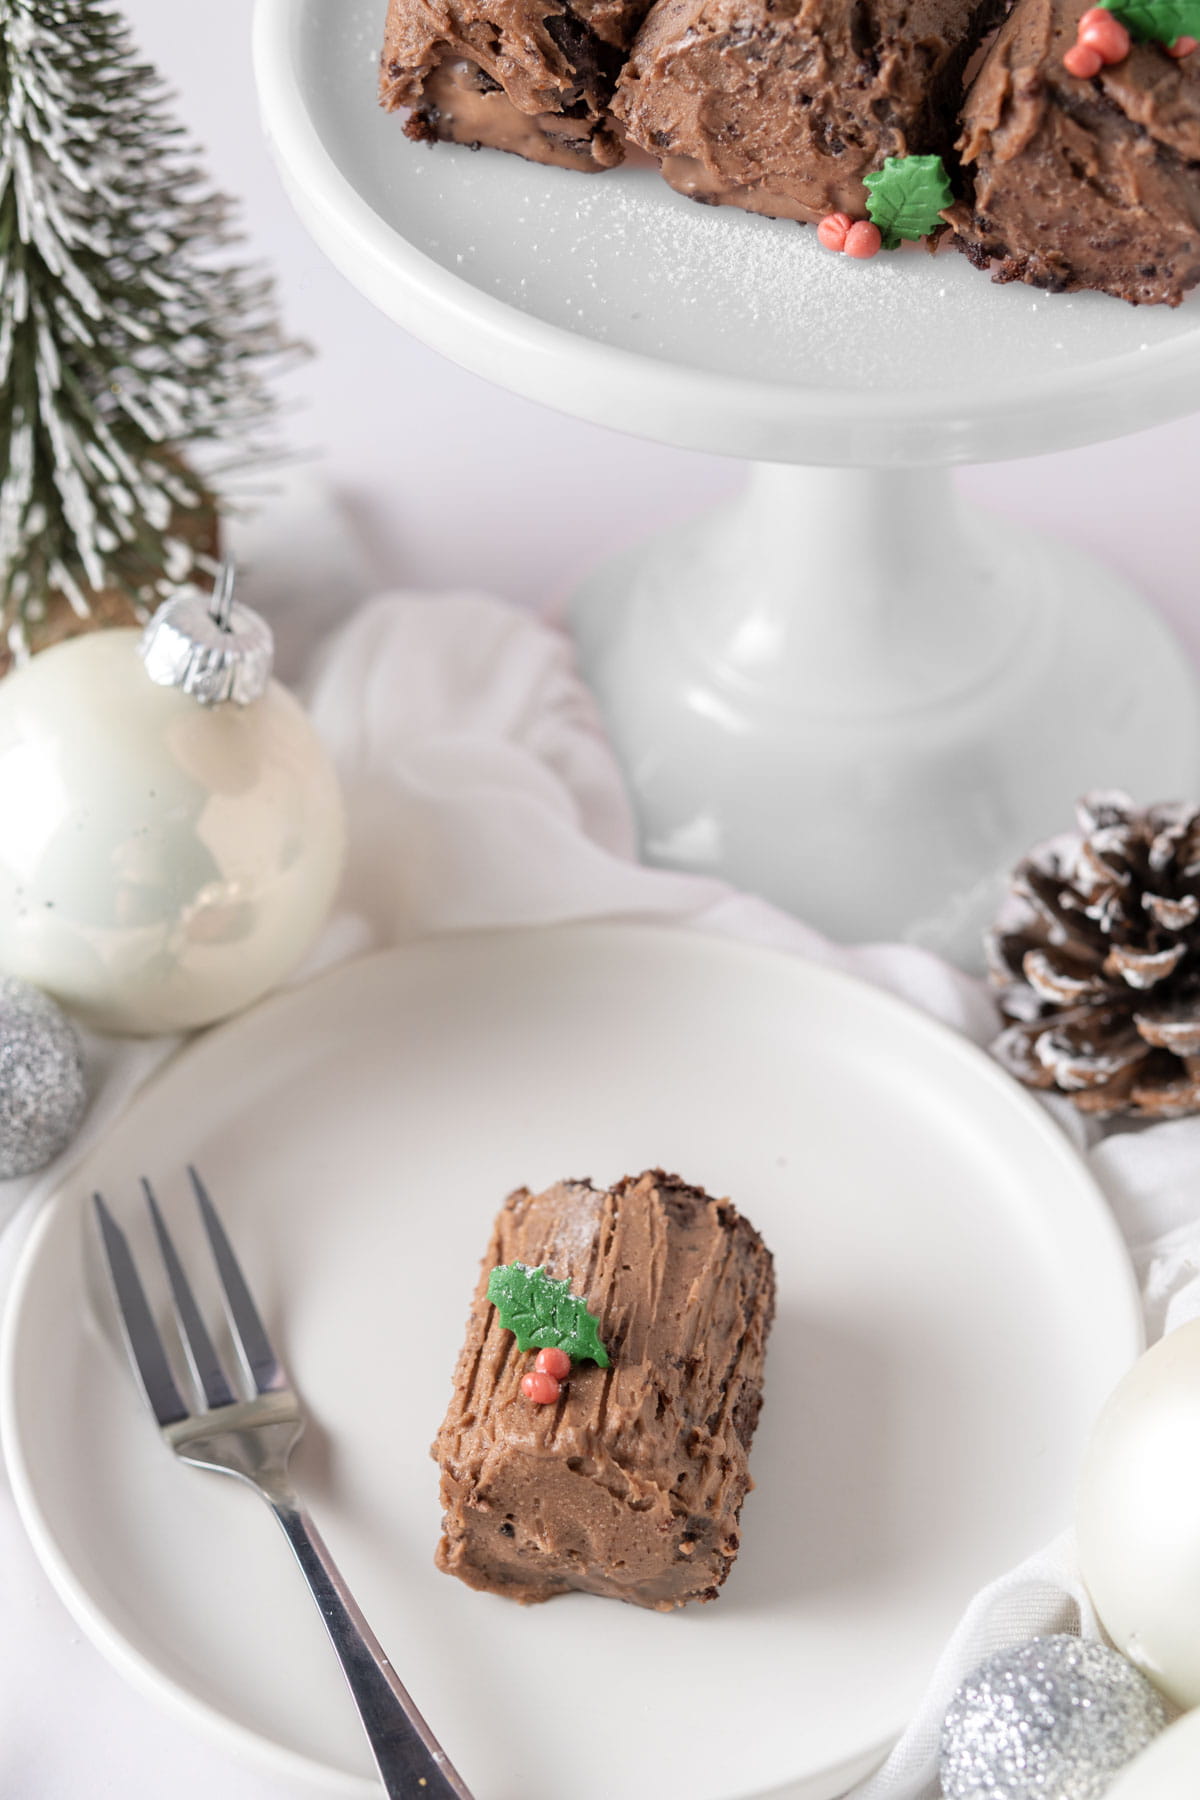
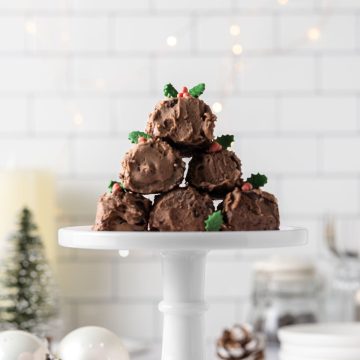
These mini chocolate Yule logs are the cutest way to enjoy cake over Christmas. Learn how to make these super easy festive treats, that the kids will enjoy helping to make too! With the lightest of chocolate sponges and a whipped chocolate cream filling encased in a chocolate buttercream, decorated with homemade fondant holly leaf decorations; they are great alternative to mince pies!

Lou’s recipe overview
SKILL: Intermediate
TASTE: Chocolate, chocolate and more chocolate
PROS: They’re easier than they look
CONS: Have a little patience when rolling
I love a swiss roll for any occasion, but for me Christmas time is their time to shine! There really isn’t a more easier, show-stopping dessert than a Christmas Yule Log on your festive dessert table. And if you make them mini there’s more to go round!
These little mini chocolate Yule logs are packed with chocolate, because you can never have enough chocolate at Christmas. But they’re really to adapt and make your own! Take inspiration from full size Yule logs and scale it down.
My chocolate peppermint swiss roll has a candy cane inspired cream filling. Just imagine the ooos and aaah when your guests take a bite into mini logs with a stripy filling.
Confession time! I had an utter baking fail with the chocolate ganache covering that I originally planned to cover these guys with. It just didn’t want to set; so I went in with some leftovers of my favourite chocolate buttercream and gave them a rustic look!
To be honest, chocolate buttercream is definitely the easier option if you’re making these with kids. They love slathering it all on and running a fork through for that retro yule log look. But chocolate ganache or chocolate buttercream, these still taste absolutely delicious!
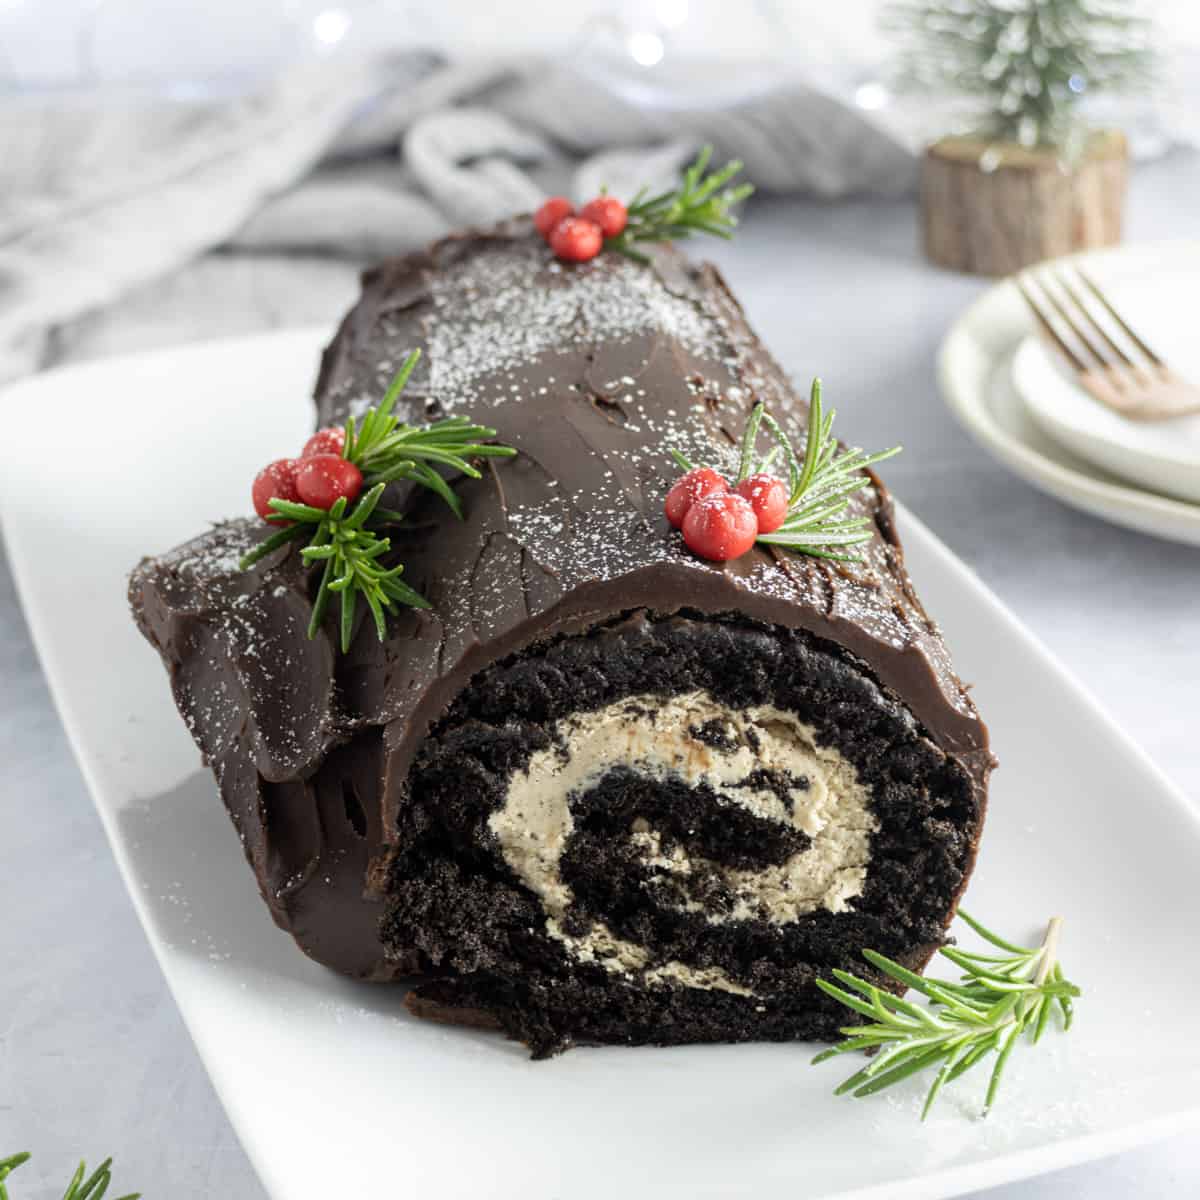
TOP TIP: If you want to give the chocolate ganache a try, head on over to my full-size Christmas Yule Log and find out how to do it without having a baking fail like me.

Ingredients and substitutions
Check out my shopping list for ingredients and equipment
The ingredients the mini Yule logs are all basic store-cupboard ones that you’ll probably already have at home. You can adapt the filling flavour to whatever you fancy; I’ve gone for Baileys but you can switch for a peppermint extract or keep it simple with vanilla. Here’s everything you’ll need…
- Cocoa Powder
- Caster Sugar
- Eggs
- Double Cream or Heavy Cream
- Vanilla Extract
- Icing Sugar
- Baileys Irish Cream – optional; I like to add a splash into the chocolate cream filling
- Chocolate buttercream – check out my ultimate chocolate buttercream recipe for the lightest and most creamy buttercream that’s perfect for these mini logs
- Sugar Holly Leaves – For the decorations, I use white sugarpaste fondant coloured red and green, and a holly leaf cutter. But if you prefer you can use pre-made sugar holly leaves instead
Recommended ingredients


BUDGET FRIENDLY: If you’re on a budget you can swap out most of the ingredients for store own-brands and many budget stores now stock good quality dupes that work just as well
Equipment you will need
These mini chocolate Yule logs are simpler to make than you might think they are, and you only need basic equipment. This is everything that I use to my this recipe…
- Swiss Roll Tray – the tray should be approximately 33x23cm / 13×9 inches in size and at least 1cm deep. I love my Masterclass trays, they give the perfect bake and last for years. Well worth an investment
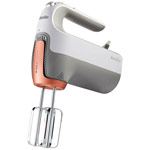
- Handheld Mixer or Stand Mixer – the batter needs to whisk for at least 5 minutes so using a mixer is easier than doing this by hand. I tend to use a hand mixer but you can use a stand mixer or a balloon whisk if you prefer
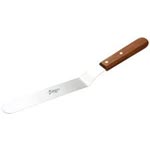
- Angled Palette Knife – I highly recommend investing in one of these, the cranked handle makes it so much easier to get the perfectly smooth filling layer. It’s one of my top 10 essential pieces of baking equipment but a regular palette knife or a spoon will work as well
- Digital Kitchen Scales – Don’t start a recipe without them! These Salter scales are my favourite, they’re a great investment
- Rubber Spatula
- Large Mixing Bowl
- Baking Parchment

CONVERT TO CUPS: There is a cup conversion option in the recipe card to convert the ingredients. This is automatic and I can’t guarantee the accuracy. For best baking results, I recommend using digital scales and weighing the ingredients.
How to make mini chocolate Yule logs
Full measurements and instructions can be found on the recipe card
There are three parts to making these chocolate Yule logs; the cake layer, the filling and assembling them. You’ll find all the details below to guide you through, and don’t forget to check out my top tips too. Let’s get stuck in…
The cake layer
TOP TIP: Make sure you whisk the filling well for at least 5 minutes. When you lift the mixer whisk up, the mixture should leave a trail for a few seconds before sinking in
- Line the swiss roll tray with baking parchment. Let the parchment over hang the sides of the tray as it makes it easier to lift out after baking
- Whisk the eggs, caster sugar and vanilla extract together using either a stand mixer or handheld mixer. When well whisked the mixture will be pale and foamy, and will have tripled in volume. This takes about 5 minutes and is really important to give you a light, springy sponge so don’t skimp on the whisking
- Sieve the cocoa powder into the whisked mixture and gently fold in with a rubber spatula until everything is well combined. I recommend doing this by hand rather than using the mixer so you don’t knock the air out of the batter.
- Pour the batter into the lined swiss roll tray and use an angled palette knife or the back of a spoon to make sure the batter is evenly spread out
- Bake the cake layer for 10-12 minutes until the sponge is light and springy
When the cake has baked, let it cool slightly in the tin then lift out onto a wire cooling rack to cool for at least 5 minutes. This allows the steam in the sponge to escape before rolling. Then you need to roll the sponge up. Here’s how…
- Dust a piece of baking parchment with caster sugar. The parchment should be as big as your sponger layer
- Turn the cake layer out onto the caster sugar roll and carefully peel off the top layer or baking parchment
- Roll the sponge up along the longer edge until you reach the middle of the cake layer; then repeat on the other side. You will end up with two rolls that meet in the middle
When you roll up the sponge, the parchment will roll up inside. This prevents the sponge layer sticking to itself while cooling.
The cream filling
While the cake is cooling, you can get ahead and make the cream filling…
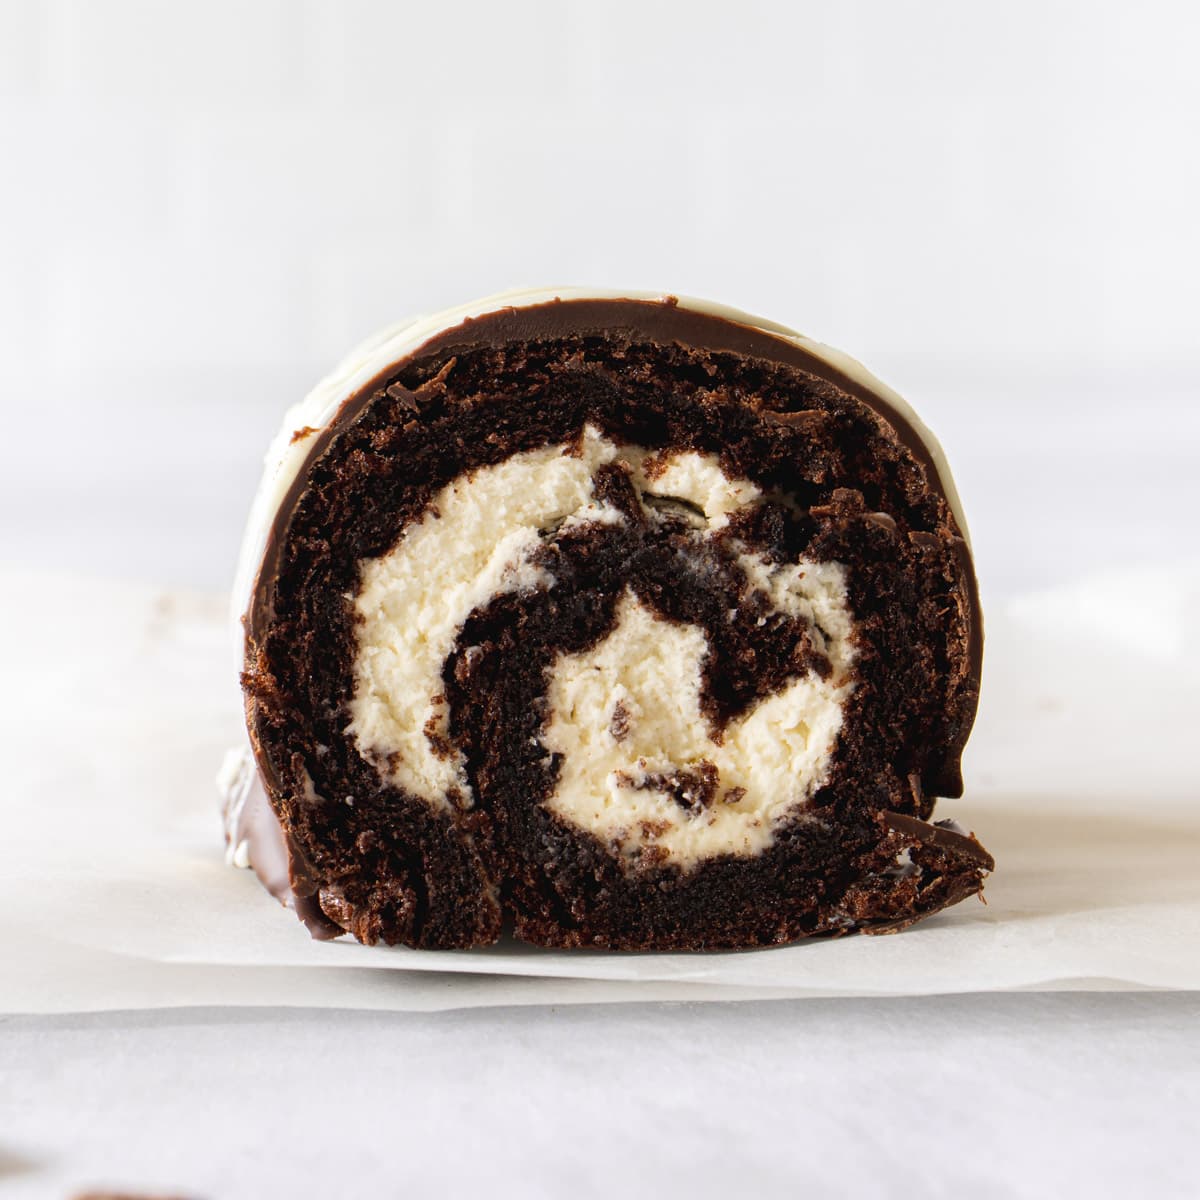
- Whisk the double cream, icing sugar, cocoa powder and Baileys together until the cream thickens but is still smooth and spreadable. Please careful no to over-whisk the cream as it will become grainy and heavy, and won’t spread as easily
TOP TIP: Swap out the Baileys in the cream filling for something different; how about a peppermint extract, an orange extract or keep it simple with vanilla.
Assembling the the Yule logs
When the cake layer is cool and the cream filling is made, you’re ready to assemble everything together and decorate. I’m using my ultimate chocolate buttercream to cover my mini Yule logs.
- Unroll the cooled cake sponge so it’s flat and lay it back on top of the baking parchment. The parchment will help you roll the sponge up again when it has the filling on top
- Spread the cream filling all over the sponge using an angled palette knife. Take the filling up to the edge of the sponge, but leave a 1cm gap all the way around. This will prevent the cream squeezing out the sides as you roll the cake back up
- Re-roll the sponge back into two rolls as tightly as possible, using the baking parchment as a guide
- Carefully slice the sponge layer into two where the two rolls meet
- Place each cake roll onto a piece of cling-film, setting them onto the seam of the roll and use the cling-film to tighten the cake roll so you get a good swirl. Pull the ends of the cling-film secure everything tightly.
- Chill the two chocolate sponge rolls in the fridge for at least 30 minutes to let the cream set; this makes it a little least messy when cutting them into the mini logs
When the sponge rolls have chilled, you can slice them into even portions around 2-inches in length. This should give you 6 to 8 mini Yule Logs of the perfect individual size. Then you just need to finish them off…
- Spread chocolate buttercream all over the individual mini logs using an angled palette knife or the back of a spoon. Remember to add buttercream to both ends as well
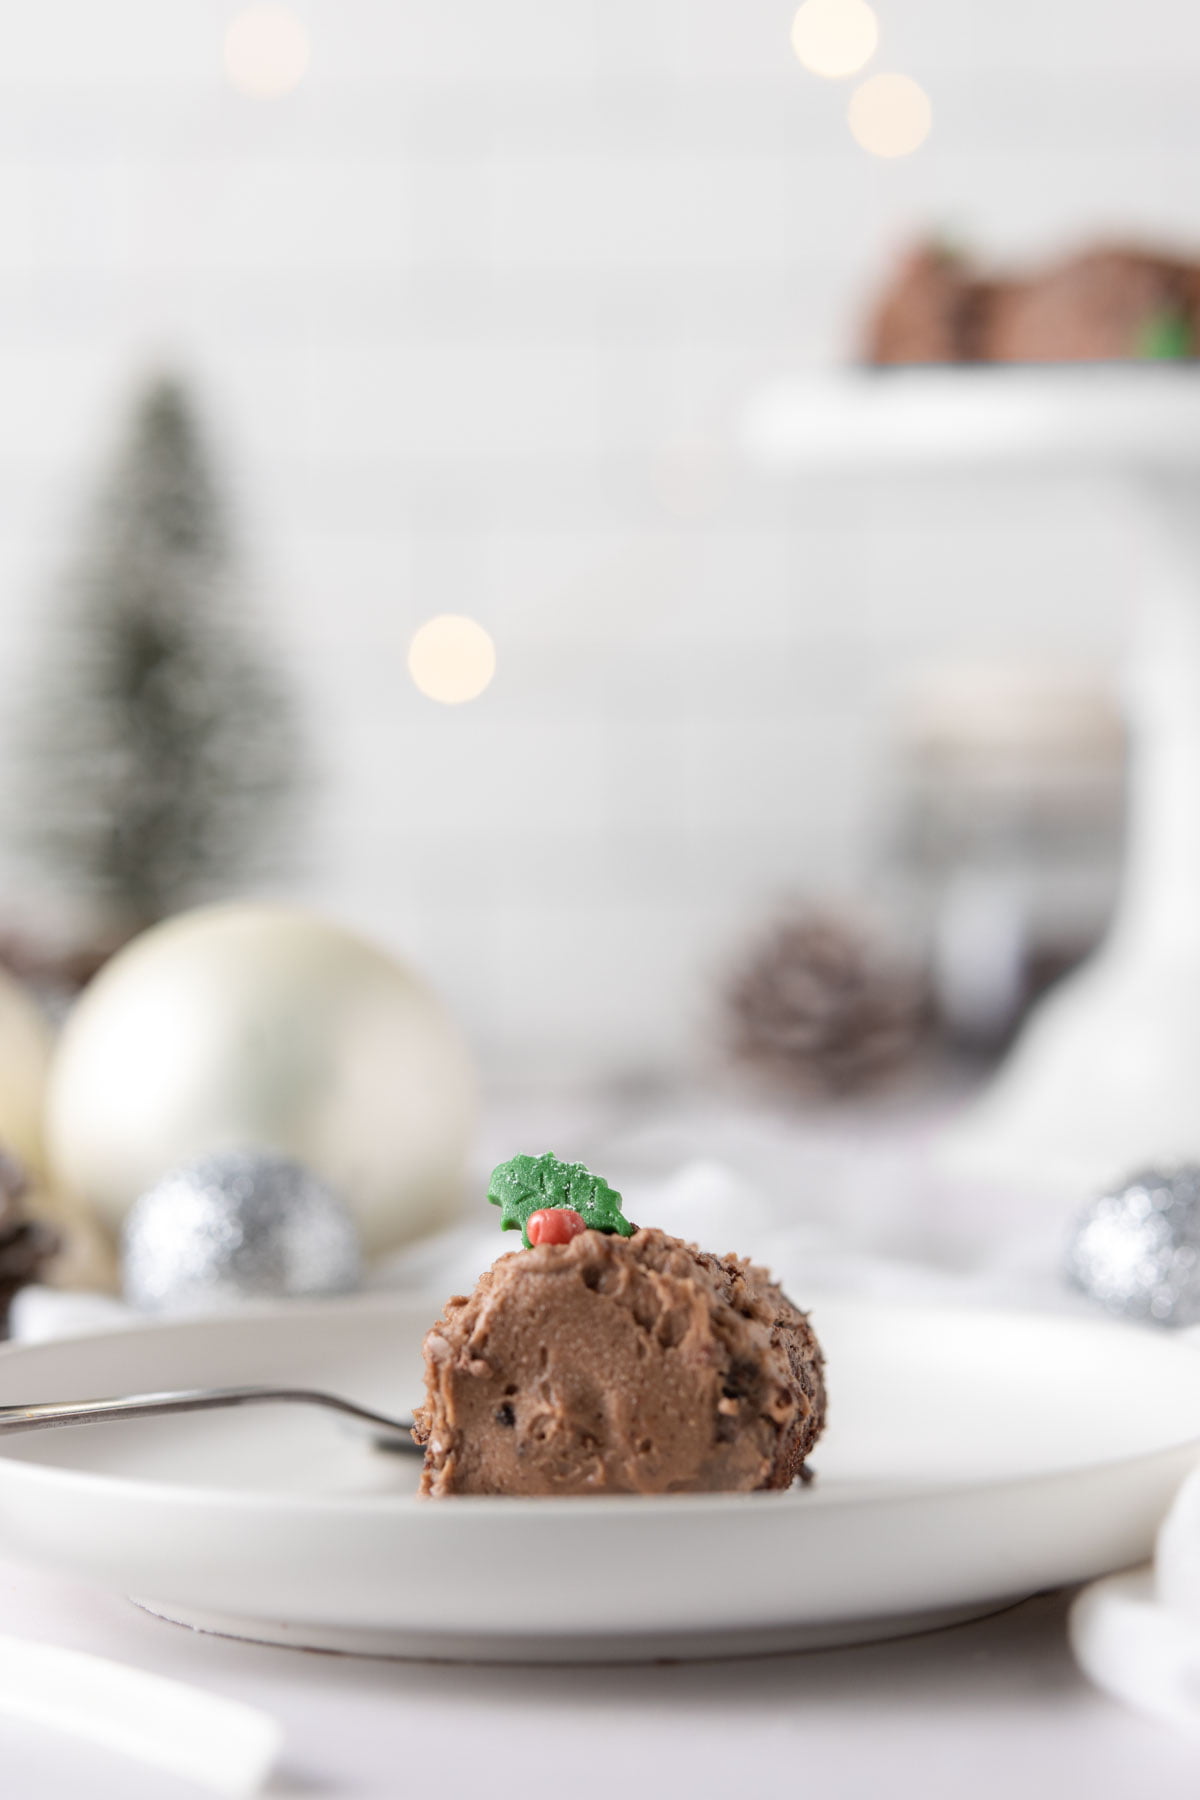
- Create a bark effect by gently dragging a fork through the buttercream
- Decorate with sugar holly leaves or you can make your own with coloured sugar paste and holly leave cutters like I have. Finish off with a dust with icing sugar
TOP TIP: If you want to give a chocolate ganache covering a try, head on over to my full-size Christmas Yule Log and for all my hints and tips.
Step-by-step video
Tips for success
These mini Yule logs are easier to make than they look. But here are my top tips that will help you when making them…
- Use the right size Swiss roll tray – For this recipe, you need a 13×9 inch tray that is 1cm deep; this will give you a light, thin sponge that you can roll tightly for the perfect spiral. If the tray is too small, the sponge will end up being thick and it will not roll as easily.
- Let the baking parchment overhang the tray – When lining the Swiss roll tray, leave an extra 1-inch width of baking parchment all around; this will help you lift out the sponge when baked and also roll it up
- Roll the chocolate sponge while it is still warm – This is my number one top tip when it comes to swiss rolls! Allow the sponge to cool slightly, but try to roll when it is still war. It makes it easier and also helps prevent cracking. Make sure to flip the sponge onto another piece of baking parchment dusted with caster sugar first and then roll up tightly.
- Roll the chocolate sponge from the longer side – This will ensure that you get a well-formed spiral and that you have enough cake to cut into mini logs. If you roll from the shorter side, you will get thicker mini logs and less cake to cut into logs
- Make a vanilla cake sponge instead – It chocolate on chocolate on chocolate is not your thing, swap the cocoa powder in the sponge for plain flour. You could ice with a white chocolate buttercream for a really snowy look instead.
FAQs about mini chocolate Yule logs
What size baking pan do I need to use?
For this recipe, you’re looking for a light and even chocolate sponge layer, so I recommend using a swiss roll tin that has an approximate 1cm depth rather than a deep sided pan. For this recipe, I use this u003ca href=u0022https://amzn.to/302uKJlu0022 target=u0022_blanku0022 rel=u0022noreferrer noopener sponsored nofollowu0022u003e32 x 24cm (12.5 x 9 inch) tinu003c/au003e.
How should I store the mini Yule logs?
As the mini logs have a fresh cream filling they must be kept in the fridge. Store them in an air-tight container to prevent any moisture. You can also separate them in the container with baking parchment, this just helps them not stick to each other while chilling
How long will they last for?
So long as you store them correctly, the mini Yule logs will keep fresh for up to 3 days. They are best eaten within a day.
Can I freeze the mini logs?
I don’t recommend freezing the mini Yule logs when they are complete, as the cream can de-stabilise if ice crystals form in it. However, you can freeze the chocolate sponge layer once it is baked. u003cbr/u003eu003cbr/u003eAfter you have rolled up the cake layer with baking parchment and before filling, let the sponge to completely cool. Then wrap in clingfilm and seal the ends. The sponge layer can be frozen for up to 3 months. u003cbr/u003eu003cbr/u003eWhen you are ready to use the cake, defrost completely before unrolling, filling and decorating.
More cake roll recipes to try
If you liked these mini chocolate Yule logs here are some other desserts that I think you’d enjoy…

Mini Chocolate Yule Logs
Ingredients
For the Chocolate Sponge Cake
- 3 Eggs Medium
- 75 g Caster Sugar or Superfine Sugar
- 25 g Cocoa Powder
- 1 tsp Vanilla Extract
For the Filling
- 100 ml Double Cream or Heavy Cream
- 25 g Icing Sugar or Powdered Sugar
- 1 tbsp Cocoa Powder
- 1 tbsp Baileys Irish Cream Optional
For the Decoration
- ½ batch Chocolate Buttercream
- Sugar Holly Leaves
- White Sugarpaste or Pre-coloured Sugarpaste, Optional
- Green Food Colour Gel Optional
- Red Food Colour Gel Optional
VIDEO
Instructions
To make the cake sponge
- Preheat oven to 180C/350F, and line a swiss roll tray, approx 13×9 inches, with baking parchment.
- Add the eggs, caster sugar and vanilla extract into a large mixing bowl, and whisk on high with a handheld mixer for about 5-8 minutes until the mixture is thick and pale. When you lift the beaters out, they should leave a ribbon of the mixture on the surface. Alternatively you can use a stand mixer with the balloon whisk attachment.3 Eggs, 75 g Caster Sugar, 1 tsp Vanilla Extract
- Sieve the cocoa powder and add to the whisked mixture and gently fold in with a rubber spatula until completely combined. Be careful not to knock the air out.25 g Cocoa Powder
- Pour the mixture into the lined swiss roll tray and gently spread into the corners with a palette knife.
- Bake for 10-12 minutes until the sponge is light and springy to the touch.
- When baked allow the sponge to cool slightly in the tin. While it is still warm, flip the sponge out onto another piece of parchment paper dusted with cocoa powder.
- Using the parchment for support, gently roll up the sponge, from each of the longer edges into the middle of the layer. You will end up with two long cake rolls. Set aside whilst you make the filling.
To make the whipped chocolate cream filling
- Add the cream, icing sugar, cocoa powder and Baileys (if using) into a large bowl and whisk with a hand mixer until the cream starts to thicken up but is still smooth enough to spread. Be careful not to over-whip as the cream will become grainy. Alternatively use a stand mixer with the balloon attachment.100 ml Double Cream, 25 g Icing Sugar, 1 tbsp Baileys Irish Cream, 1 tbsp Cocoa Powder
To assemble the mini Yule logs
- Unroll the chocolate sponge and place onto a layer of cling film. Spread the whipped chocolate cream all over, taking the filling as close to the edge as possible. Make sure you don't add too much cream otherwise the cake will not roll easily.
- Re-roll the sponge layer back up into two cake rolls, making sure to get the spiral as tight as possible.
- Slice the chocolate sponge layer into two equal portions at the point where the two rolls meet; this will be approximately in the centre of the sponge layer.
- Place each roll, seam-side down on a piece of cling-film. Roll the cake roll up into the cling-film using it to tighten the swirl and pull the ends of the cling film tightly to secure. This will help form the perfect swirl and keep everything in place.
- Allow the full length chocolate rolls to chill in the fridge for at least 30 minutes to let the cream set.
To decorate the mini Yule logs
- Once the filled rolls have chilled, remove the clingfilm and slice into 3 or 4 portions, all equal in length. Use a smooth bladed knife to get the perfect cut.
- Spread chocolate buttercream all over the individual mini logs using an angled palette knife or the back of a spoon. Remember to add buttercream to both ends as well. Create a bark effect by gently dragging a fork through the buttercream1/2 batch Chocolate Buttercream
- Allow the chocolate buttercream to 'set' for 30 minutes before eating, this makes them a little easier to handle.
- Colour white sugarpaste with red and green food colouring gels, or use ready coloured sugarpaste, Use the green sugarpaste for holly leaves using a holly leaf cutter , and roll the red into small balls for the berries.White Sugarpaste, Green Food Colour Gel, Red Food Colour Gel
- When ready to serve add add the sugar holly leaf decorations and a dusting of icing sugar to finish. Alternatively you can use readymade edible decorations.Sugar Holly Leaves
Notes
Nutrition
DISCLAIMER
The nutritional information provided is approximate and is calculated using online tools. Information can vary depending on various factors, but we have endeavoured to be as accurate as possible.

